Meal prep can be fun, colourful and time efficient. Author of ‘Bento Power’ Sara Kiyo Popowa shares six bento box recipes
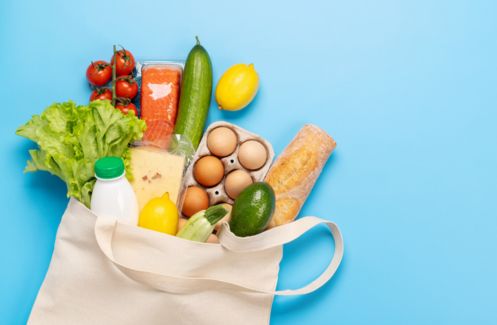
Whether you want to save money, eat healthier or quit having sad meals at your desk, investing some time in preparing vibrant and fun lunch boxes means you will always appreciate and look forward to eating your lunch.
Inspired by her Japanese roots, Popowa’s collection of recipes are vegetarian, dairy-free, and mostly vegan and gluten-free.
‘Bento originates from a culture where ritual and presentation plays an important part of daily life,’ explains Popowa.
bento – a box of delicious treasures
‘I love the concept and structure of bento – a box of delicious treasures,’ Popowa continues. ‘What I don’t love so much about typical Japanese bento is that it’s heavy on meat and deep-fried food and stingy on veggies.’
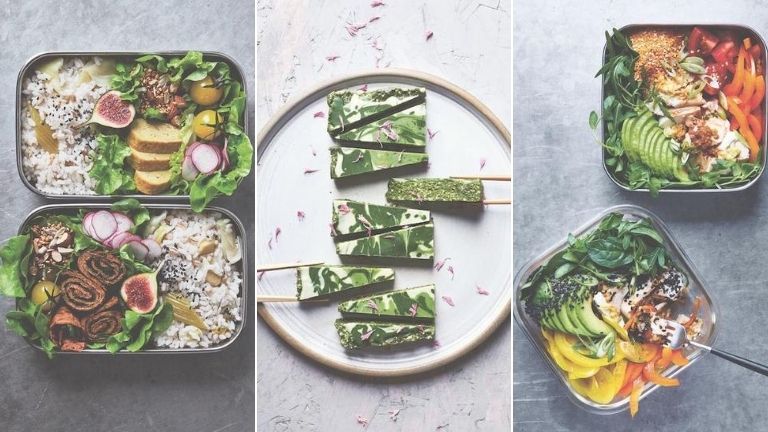
‘My bento has less small dishes, more greens and often more raw components than typical Japanese bento. To make my bento, I focus on using these five elements: grains/carbs, leafy greens, protein and fat, fruits and vegetables, and sprinkles and boosts.’
Bento Box #1 Fluffy Grain-free Pancakes with Overnight Chia Jam
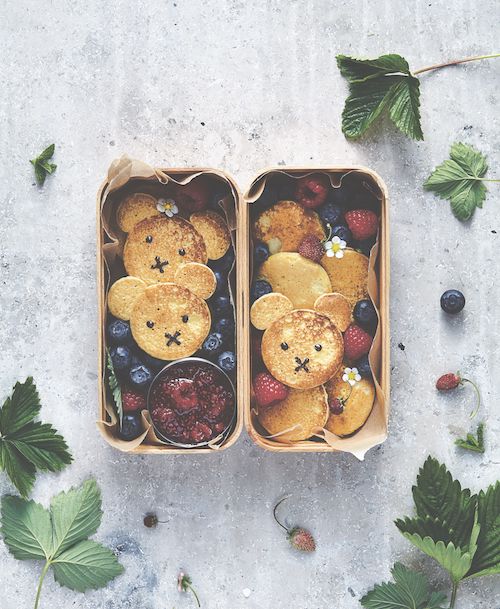
At the start of my Instagram journey, I was amazed by the amount of pancakes people posted. Most were the small fluffy kind in a pretty stack with chocolate dribbling down its sides. I wanted some too! Somewhere I read you could make pancakes out of nuts and eggs and so I did.
These little flourless wonders are packed with protein and good fats and are equally good with sweet or savoury toppings. Overnight chia jam is my little hack to have jam ready for breakfast with minimal effort.
What is chia jam? I‘d prefer to call it ‘instant jam‘ with the benefits of gelatinous chia seed (hydrating, fibre, omegas) and being able to use any natural sugar I like.
Makes 12–16 tiny pancakes (6cm diameter), 1–3 portions
Fridge life pancakes and chia jam: up to 3 days
Freezer life (pancakes only): up to 1 month
To make the Overnight Chia Jam
Ingredients:
- 200g frozen raspberries
- 1 tbsp chia seeds
- 2 tbsp coconut palm sugar or 1 tbsp clear honey, or to taste
- 4 tbsp water
Method:
The jam is best made the evening before you want to serve it, or at least four hours before, but you can do a speedy version too.
1. Place all the ingredients in a glass jar with a lid, close and give it a good shake. As soon as the water touches the chia seeds they start swelling and sticking together, so if you can, shake the jar a couple of times during the first 30 minutes or so.
2. If you‘re making a speedy version, place your jar in a pan of hot water (to melt the berries) and it‘s ready to use after about an hour.
3. For the overnight version, the berries will slowly melt and plump up the seeds with their juice. Give it another shake and taste to see if it‘s sweet enough; if not, add a little extra sugar or honey.
To make the Cashew Pancakes:
Ingredients:
- 100g cashews
- 2 organic medium eggs
- 1/4 tsp baking powder
- pinch of sea salt
- 100ml water
- a little oil, to fry
Method:
1. Place the cashews in a blender and blend to make a coarse flour, then add the rest of the ingredients (except the oil for frying) and blend on the highest setting until very thick and fluffy, like whipped custard – this will take a couple of minutes in a standard blender.
2. Add a little more water if the mixture seems too thick to blend or pour.
3. Preheat a frying pan over a medium heat and rub with a little oil.
4. Pour the batter straight out of the blender (or use a spoon) to form small pancakes in the pan and then lower the heat (you‘ll need to cook the pancakes in batches).
5. When you start seeing small bubbles at the top of the pancakes, after about one minute, gently flip them over and cook for a further minute or so.
6. Remove to a plate and cover with a piece of baking paper, then leave to cool before packing in your bento. Repeat to make the rest of the pancakes, until all the batter has been used up.
Tip: To make the bear pancakes, once you’ve poured a dollop of batter in your pan for a pancake, use a small spoon and carefully drop a little batter at the edges of each pancake. Flip gently.
For the eyes, melt a little dark chocolate either in a heat-proof bowl over a pan of simmering water, or in a microwave oven. Once the pancake is fully cool, draw the face on with a cocktail stick or very thin chopsticks.
To freeze, ensure the pancakes are fully cool, then lay in one layer in a large ziplock bag – you can then take them out one at a time and heat in your toaster, or simply pack in your bento to defrost by lunchtime.
Bento Box #2 No-bake Matcha Brownies
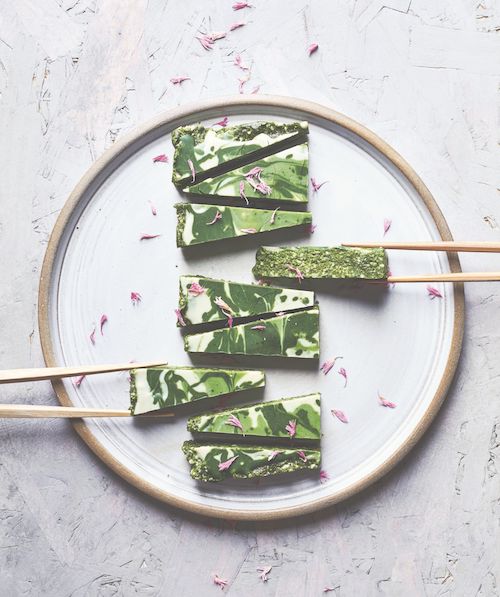
Pretty little treats for your bento! Matcha green tea powder can be used in a similar way to cacao powder and, just like cacao, it adds both flavour (a subtle, multi-layered green flavour that I‘m personally addicted to), and an uplifting effect. I use high-quality ‘ceremonial-grade‘ matcha for this recipe.
In Japan, matcha-flavoured white chocolate is an art form in itself, so I’ve played with it here to make a show-stopping coating (but you can roll your dough into small naked balls instead if you prefer). The recipe is easy to double, or triple, in a food processor (for one batch a reasonably strong blender will work well).
The oats add creaminess and make the bites lighter, brown rice syrup adds a slight chewiness and miso rounds everything off beautifully.
Makes about 18 x 3cm square pieces
Fridge life: up to 3 weeks
To make the base
Ingredients:
- 50g cashews
- 50g almonds (blanched if possible)
- 50g rolled jumbo oats
- 3 tbsp brown rice syrup
- 1 tbsp raw coconut oil (no need to melt it)
- 1 tbsp matcha powder
- 1 tsp brown rice miso paste
Method:
1. For the base, line a small baking tin (a loaf tin, about 20 x 10cm, works well) with baking paper.
2. Place the nuts and oats in a blender or food processor and process to a coarse flour.
3. Add all the remaining base ingredients and process until the mixture looks moist and just starts lumping together.
4. Squish the mixture into the lined tin to form an even base.
To make the coating
Ingredients:
- 20–40g vegan white chocolate (iChoc is ideal)
- 1/2 tbsp raw coconut oil
- 1/2 tsp matcha powder
Method:
1. For the coating, melt the white chocolate and coconut oil together. You can either do this in a small heatproof bowl placed over a pan of simmering water, or use a microwave.
2. Spread half of it evenly over the base.
3. Using a fork, whisk half the matcha powder into the remaining melted chocolate and drizzle half of it, or a little more, over the base in a random way.
4. Mix the remaining matcha and melted chocolate together for a dark green final touch and drizzle this over the base, again, the more random the better.
5. Drag a cocktail stick through the white and green chocolates to create patterns.
6. Chill in the fridge to firm up, then cut into triangles or squares using a big, sharp knife. For the neatest results, heat the knife by dipping it in hot water and wipe it between cuts.
7. Stack the brownies in an airtight container using a piece of baking paper between layers to keep the coating tidy-looking (optional). Store in the fridge.
Bento Box #3 Hiya-yakko – Cool Tofu Scramble Bento
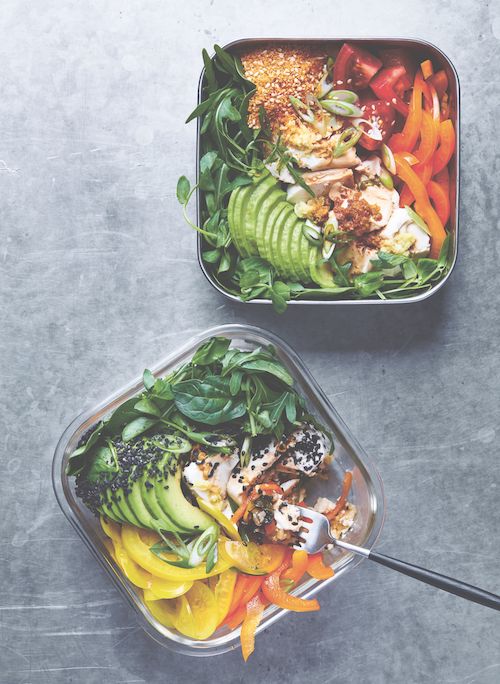
‘Hiya-yakko‘ is a Japanese summer dish: a block of chilled silken tofu, perked up by soy sauce, grated fresh ginger and spring onions on top. I like making it into a bento, with colourful veggies and a sheet of nori in between the tofu/veggie topping and the rice base.
Why the nori? By lunchtime, the tofu has released some liquid, which softens the nori which mixes with the other seasonings as you dig in – simply delicious.
Makes 1 bento box
Fridge life: up to 24 hours.
Ingredients:
- 1 portion of pre-prepped 50/50 rice or quinoa
- 1/2 nori sheet
- a handful of salad greens, like rocket, watercress or baby spinach
- 1/4 avocado, flesh scooped out or sliced
- 1/4 pepper, thinly sliced
- 1 ripe tomato, roughly chopped
- 75–100g organic silken tofu
- 1cm piece fresh ginger, washed but unpeeled
- 1 tbsp tamari
- 1 spring onion, finely sliced
- 1 tbsp gomashio (any type) or toasted sesame seeds
Variation: Instead of topping the tofu with tamari, ginger and spring onion on the tofu, try my Japanese friend Akki‘s topping of 1/2 tbsp toasted sesame oil, a good pinch of flaky sea salt and a small bunch of garlic chives, finely snipped with scissors.
Method:
If you have a square box you can make a diagonal shape, as in the image.
1. To assemble, use a leak-proof box. Make a bed of rice, as even as possible, and lay the nori on top. Rip bits off the nori to fit, and include all of it.
2. Place the salad greens at one end of your bed and top it with the avocado, then place the pepper and tomato at the other end.
3. Drain the liquid from the tofu pack and gently slide out your preferred portion directly in between the two veggie mounds. You may need to push down on the tofu with a spoon or your clean hands to break it slightly.
4. Finely grate the ginger over the tofu (using a microplane or box grater) then drizzle the tamari over and the spring onion too.
5. Finish with the gomashio (or toasted sesame), in a small mound, to mix in when eating. Close your box and pack in a bento bag or furoshiki with a fork or chopsticks.
Bento Box #4 Tamago-yaki Bento and Seed Omelette Bento
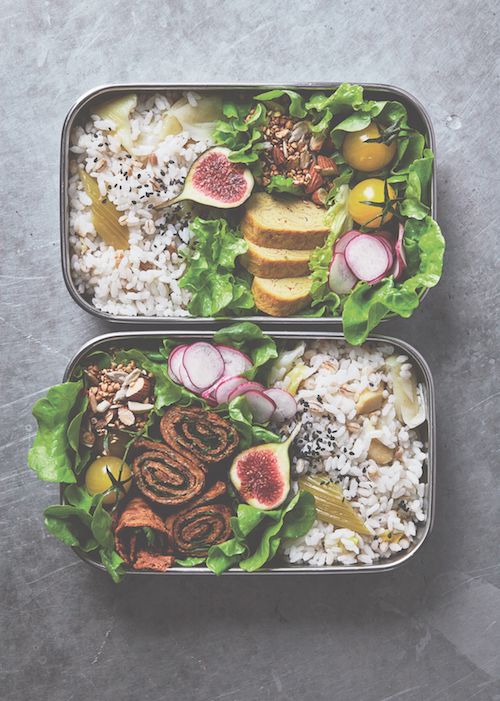
‘Tamago-yaki’ really is one of the most classic bento fillings, so much so that some think it‘s not a real bento if it‘s not in there! You may have tried it as sushi – a neat, yellow and often very sweet omelette slice.
My version is a lot less sweet and less complicated to make and I‘ve cut out the more difficult-to-source ingredients.
To make a plant-based alternative to Tamago-yaki, I experimented with millet, which has a lovely yellow colour and a decent protein count. Soaking the seed (which I do for this ‘omelette’) you could say, at least symbolically, it is a plant‘s equivalent of an egg – the beginning of their offspring, activated (by water) and ready to grow into a plant! It needs a long soak (best overnight) to work or it will break in the pan.
Makes 1 portion
Fridge life: 3 days.
To make the Seed Omelette
- 3 tbsp millet
- 1 tbsp golden linseeds
- 100ml water
- 2 tsps tamari
- 1/4 tsp baking powder
- 1/2 tsp extra virgin olive oil, to fry
- a couple of sprigs of flat-leaf parsley or dill, finely chopped, optional
- black pepper, to taste
Method:
1. Soak the millet and linseeds and measured water overnight.
2. Without draining the water, add tamari and baking powder, and blend on high until very smooth (a small blender jug works best).
3. Heat a frying pan over a medium/high heat, drizzle with a little oil and pour all the batter in, spreading it out like a crepe.
4. Cook for 2–3 minutes, until brown underneath and it seems to hold together enough to flip.
5. Flip carefully as it is more delicate than an egg omelette, and cook for a further 2–3 minutes, until brown and still a little moist inside.
If it seems like it may burn at any point, turn the heat down a little (the omelette likes it quite hot, so not too low).
6. Transfer to a chopping board. To get the swirl effect seen in the image, scatter the parsley and pepper all over the omelette.
7. Then, starting from one end, firmly roll it into a roll. Or, use gomashio instead of herbs.
8. Let it cool slightly before cutting into 4cm pieces, short enough to fit into your box, standing on one end like in the image and pack immediately (or they may unravel). Store leftovers in an airtight container in the fridge.
To make the Bento
Ingredients:
- 1 portion of pre-prepped farm rice, or any rice
- a handful of salad greens
- 2–3 slices tamago-yaki or 1 seed omelette
- a few cherry tomatoes
- 1 radish, thinly sliced (use a mandolin if you have one)
- 1 fig, halved
- 1–2 tbsp savoury granola
- toasted black sesame seeds, to taste
Method:
1. Fill one side of your bento box with rice.
2. In the remaining space, make a bed of lettuce, then arrange the tamagoyaki slices, or rolled seed omelette on top.
3. Add the cherry tomatoes, radish, fig and savoury granola in separate mounds and finish with a sprinkle of sesame seeds.
4. Close your box and pack in a bento bag or furoshiki with a fork or chopsticks.
Bento Box #5 Purple Shiso Mini-onigiri Bento
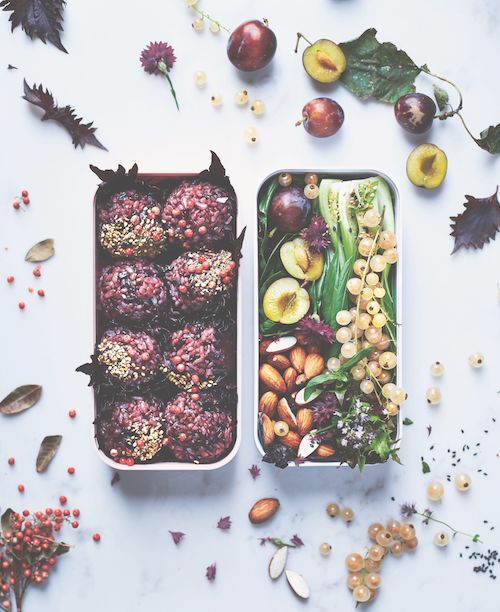
Since that trip to Japan where I got hold of shiso seeds, I‘ve been growing either green or red shiso every year.
Red shiso leaves are tougher than green with a more fruity flavour. Normally they‘re best cut fine and mixed in to flavour a dish (try with kiwi, lime and brazil nuts in a salad, it‘s amazing), or dried or preserved, but I think they work really well wrapped around rice balls too.
I just had to use purple rice for this bento, contrasted by whitecurrants, which I only get once a year when they‘re in season at my farmers‘ market. The pink pepper is a surprise flavouring – its resinous flavour works really well with the red shiso.
Makes 12 mini-onigiri, 2–3 portions. Eat the same day
To make the Onigiri Raw Beauty Box
Ingredients:
- 1 batch of black gradient rice
- 4–5 tbsp white gomashio, or use the same amount toasted sesame seeds, lightly crushed
- 1 tsp pink peppercorns
- 12 red shiso leaves (see Tip)
- flaky sea salt, smoked if possible, to shape the onigiri
Method:
1. Snip off the shiso stem, close to the leaf.
2. Place the gomashio, or sesame seeds, along with the peppercorns on a small plate, and have a small bowl of water and salt ready.
3. Wet your hands in the bowl and dab some salt on your palms.
4. Grab a heaped tablespoon of rice and gently but firmly hug it into a ball (rather than roll), using rhythmical hugs.
5. Wrap the ball in a shiso leaf and dip one side of it in sesame seeds and pink peppercorns (looks more interesting on one side rather than the whole ball) and pack into your box.
6. Repeat until you have 12 balls.
To make the Bento
Ingredients:
- 1 pak choi, trimmed and halved lengthways
- a small handful of salad greens
- 2 tbsp whole almonds, soaked overnight in cold water (see Tip)
- 2 small Victoria plums
- 3 purple cornflowers
- a few sprigs of flowering thyme
- 2–3 bunches whitecurrants
Method:
1. Finely shred one half of the pak choi across and mix it with the salad greens to make a bed in the raw beauty box.
2. Lay the second pak choi half on top, cut side-up, and arrange the almonds and plums (whole or cut in half like in the image) in separate sections.
3. Finish with the flowers and currants.
To arrange ingredients around the box/es, like in the image, picture the line of movement of one particular ingredient (pink pepper for example), inside the box.
Continue this line of movement outside of the box, taking care not to make it look too ‘placed‘. The ingredients are your brush strokes – be bold and natural.
Bento Box #6 Rainbow Salad Sushi Roll Bento
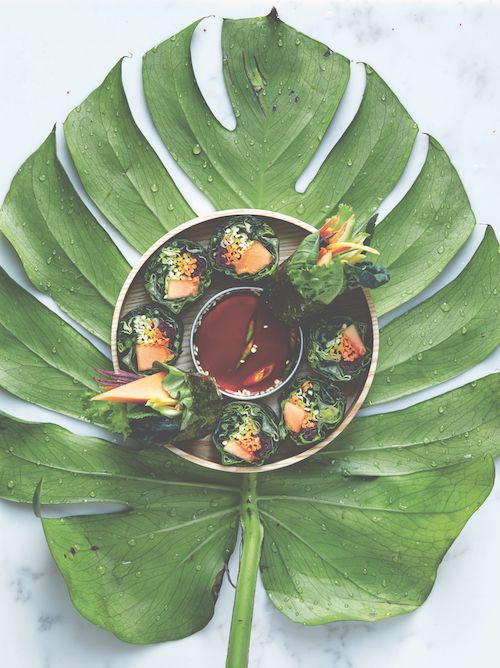
I love making nori rolls like this! Raw salad vegetables tightly rolled together, dipped in a spicy dressing – the perfect summer food. If you haven‘t tried making nori rolls before, I find salad rolls easier than rice ones to start with.
The green leaves are your ‘rice’ here, most lettuce works as long as it‘s quite soft, thin and pliable. You can use any kind of vegetable or fruit to fill as long as its not too soft or wet. Just cut them into thin long slices. It‘s quite amazing how much salad you can get into one roll!
Makes 16 bite-sized pieces, 2 portions
Fridge life: up to 24 hours
Ingredients:
- 2 nori sheets
- 2–6 large salad leaves (enough to cover half a nori sheet in double layers of leaf)
- 1 each of a small purple, orange and yellow carrot
- 1 small courgette
- a couple of 1–2cm slivers of papaya, or watermelon, deseeded
- a few fresh mint or basil leaves
- 1 avocado, cut into thin slivers a small handful of green beans, quick blanched and trimmed, optional
To make the Light dipping sauce
Ingredients:
- 1 tbsp tamari
- juice of 1/4 lime
- 1 hot small chilli (bird‘s eye), cut in 4 pieces on the diagonal
- 1 teaspoon maple syrup, optional
- a pinch of toasted sesame seeds, any colour, optional
To make the Creamy dipping sauce
Ingredients:
- 1 tbsp almond or peanut butter
- 1/2 tbsp water
- 1 tbsp tamari
- juice of 1/4 lime
- 1 tsp maple syrup
- 1cm piece fresh ginger, washed and finely grated
Method:
1. To prepare the fillings, wash your leaves and pat them dry (very wet leaves will dissolve the nori).
2. Use a julienne slicer, a potato peeler or a sharp knife to slice about half of each carrot into very thin strips lengthways. Do the same with half the courgette (store leftover vegetables in an airtight container in the fridge). If you decide to strip the whole of the carrots and courgette, you can use leftovers to make courgetti – toss the strips in dressing, or gomashio and a little lemon and oil.
3. When you fill the roll, it is best to use a sushi mat, but you can also use a sheet of baking paper, or a clean tea towel laid out on your work surface.
4. Place a nori sheet on top of your mat, shinier side-down.
5. Cover the lower half of the sheet with flattened salad leaves, cut or rip them if needed, to cover as evenly as possible, as this will make it easier to roll. Allow some leaves (and some of the filling) to peek out each end – this will make the finished pieces look pretty.
6. Lay the carrot and courgette strips in an even, horizontal line across the middle of the salad, keeping them as separate as possible colour-wise.
7. Top with strips of papaya (or watermelon), mint (or basil) leaves, avocado and green beans, if using. Make sure everything is put in as even thickness as possible.
to make my bento, I focus on using these five elements: grains/carbs, leafy greens, protein and fat, fruits and vegetables, and sprinkles and boosts
8. To roll the roll start from the bottom, the edge closest to you. Use the mat to start rolling the fillings up, tucking them in with your other hand. Focus on bunching up the inside filling into an even and tightly held long sausage as you roll.
9. To tighten it, use one hand to hold the mat (and, if possible the nori too) at the top while you pull the sausage towards you, compacting it, then continue rolling.
10. Once rolled, keep holding it tight, wet a couple of your fingers then wet the top edge of the nori, then roll it shut, while still keeping it as tight as possible.
11. Leave it to rest for a few moments, seam side-down, before cutting.
12. To cut, use a wet, sharp knife, and cut using quick sawing movements (to ensure the roll doesn‘t get squashed).
13. Arrange the rolls in your box cut-side. Place the end rolls either fringy bit up, or lay them down depending on how much space you have.
14. To make the dipping sauce, if you’d like a light sauce pour all the ingredients into a small, leak-proof container with a lid.
15. For a creamy sauce, stir the nut butter, water, tamari, lime juice and syrup together in a small, leak-proof container with a lid until smooth.
16. Squeeze the grated ginger to extract the juice straight into the sauce and combine well.
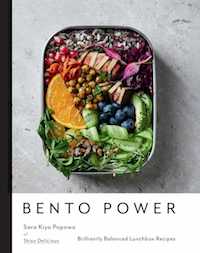 Sara Kiyo Popowa of Shisho Delicious runs bento making events and workshops and is the author of Bento Power, published by Kyle Books, priced £18.99.
Related Healthista Content
4 Poke bowl recipes for beginners
5 quick and easy low-carb recipes you will LOVE
6 gluten-free recipes with the wow factor
5 mood-boosting recipes from Instagram star Bettina Campolucci
Like this article? Sign up to our newsletter to get more articles like this delivered straight to your inbox.