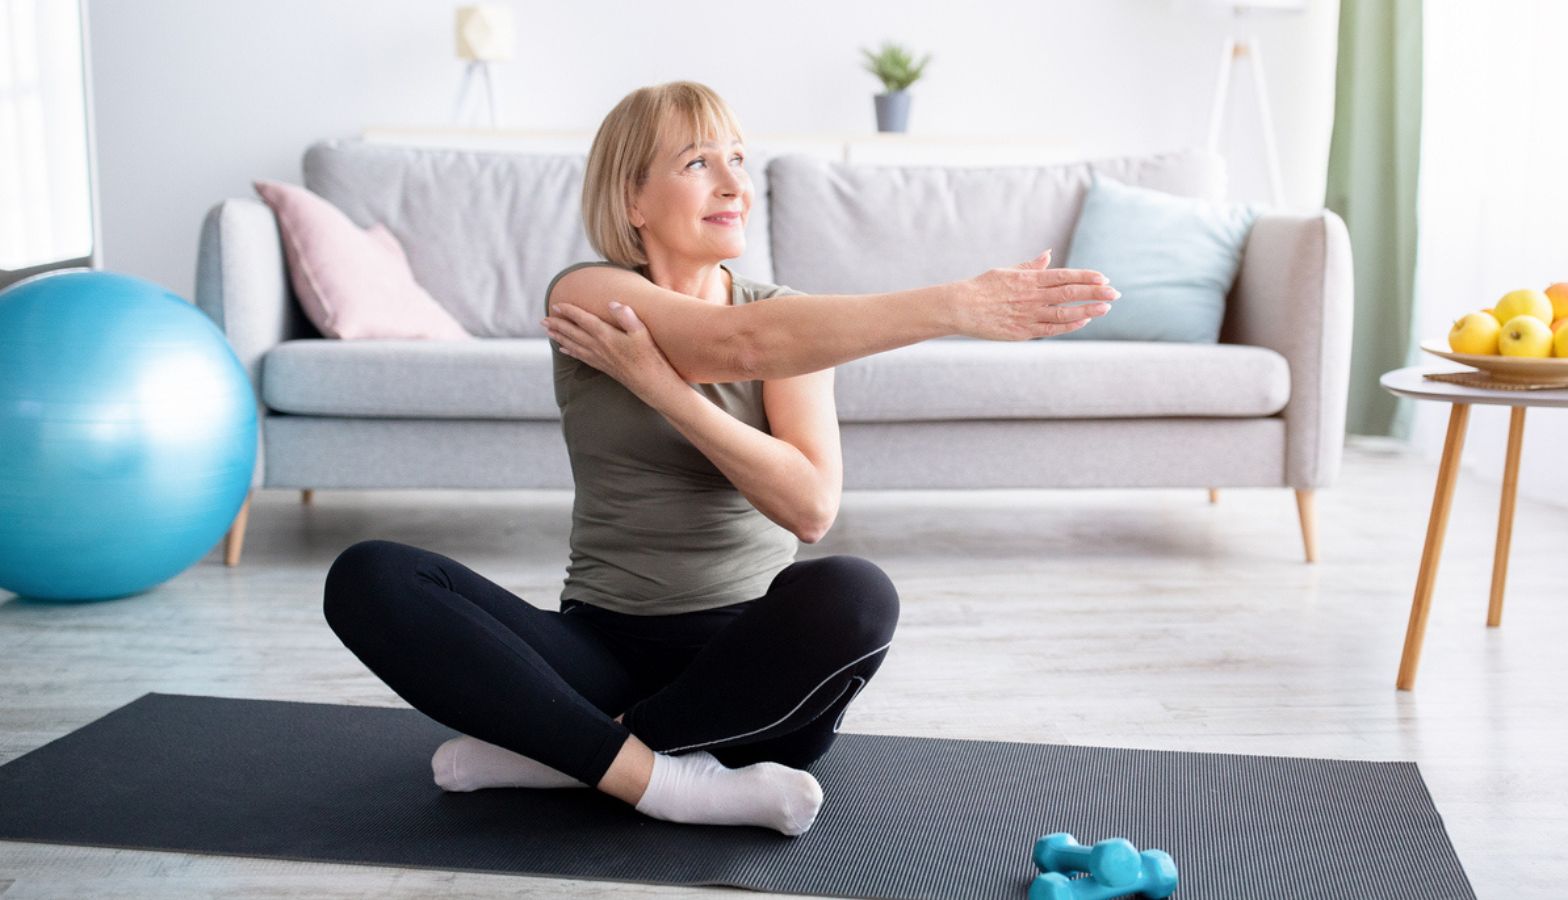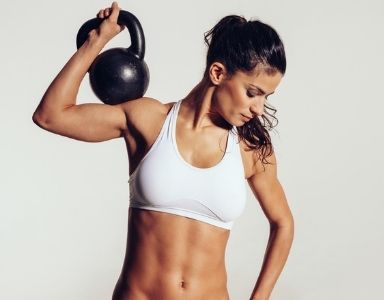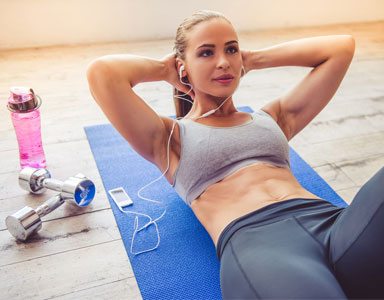
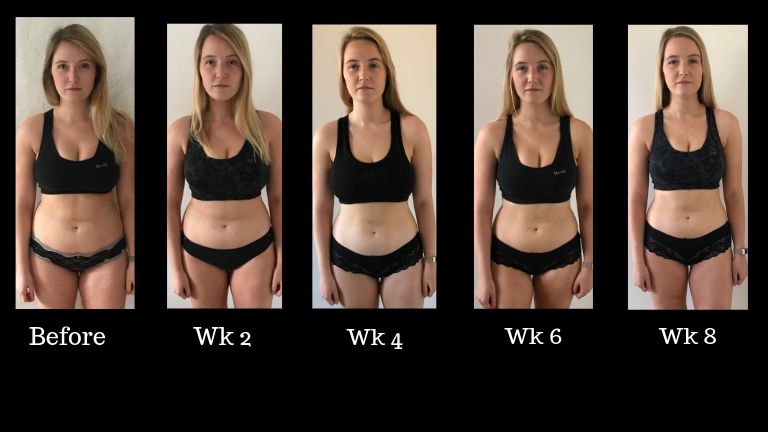
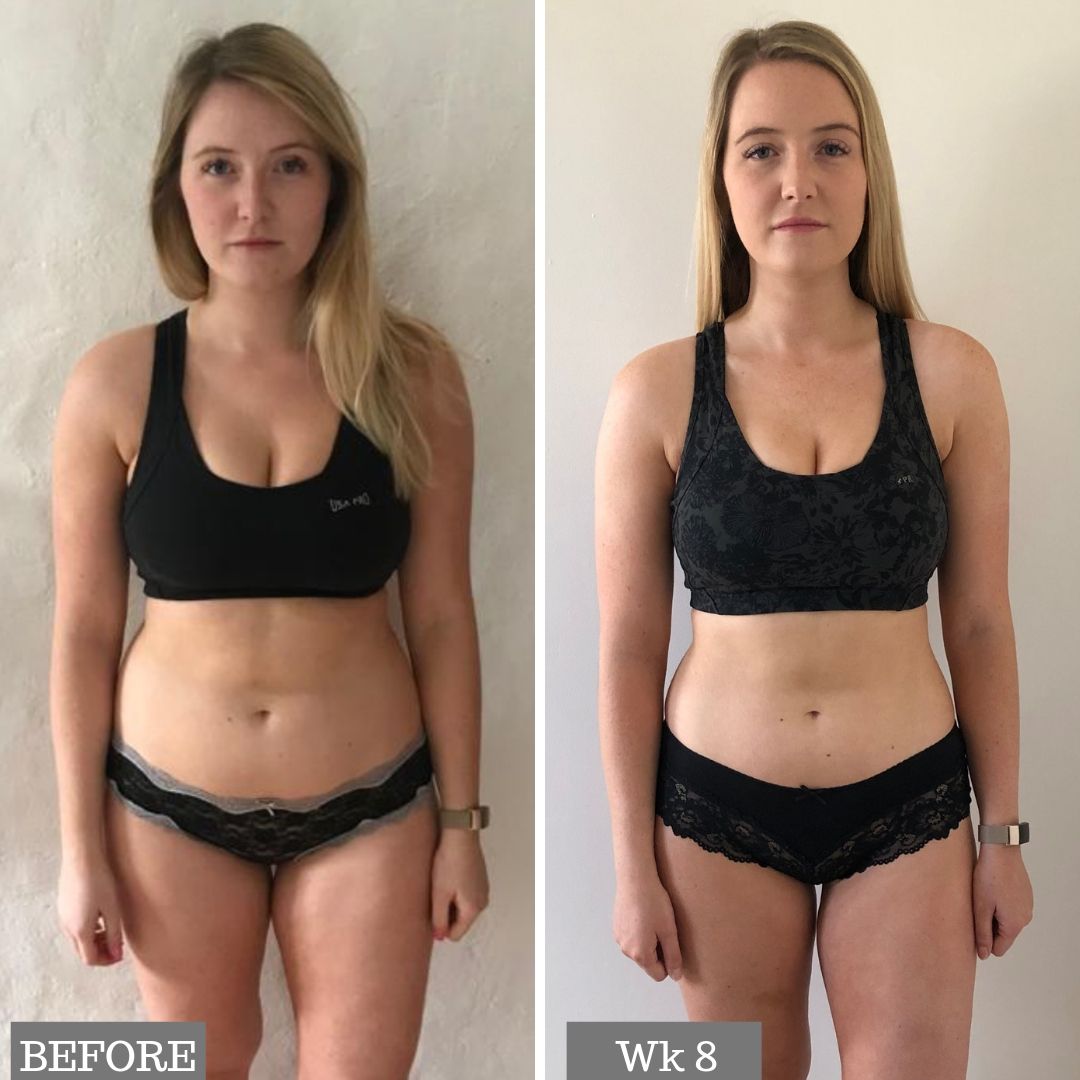
Healthista’s Olivia Hartland-Robbins is onto week eight of her body transformation at Transition Zone gym and she has lost just under 6kgs and 5 per cent body fat
O M GEE nobody panic – but it’s week 8. That means I only have four weeks left and after hitting a plateau last week, you can bet I am feeling the pressure just a smidgen.
I am doing so well (if I do say so myself) but a very small part of me can’t help but think maybe this will be as good as it gets. When mentioning this to my friends and family that have basically told me to get a grip.
I need to keep reminding myself that weight loss journeys take time, this body of mine is a work in progress not an overnight miracle – and seeing how well I’ve done so far I really do just need to GET A GRIP.
| Before | Week 1 | Week 2 | Week 3 | Week 4 | Week 5 | Week 6 | Week 7 | Week 8 | |
| Weight kg | 68.9 | 67.4 | 66.3 | 65.5 | 64.8 | 64.8 | 64.5 | 63.8 | 63.2 |
| Body Fat % | 27.0 | 25.8 | 24.2 | 24.6 | 23.2 | 22.8 | 22.4 | 23.1 | 22.7 |
| Hips cm | 107 | 107 | 104 | 105 | 104 | 104 | 104 | 102 | 101 |
| Waist cm | 77 | 75 | 74 | 73 | 71.5 | 71 | 71 | 72 | 70 |
| Stomach cm | 90 | 88 | 86 | 86 | 84 | 83 | 84 | 84 | 83 |
| Thighs cm | 56 | 55 | 54 | 55 | 54 | 54 | 54 | 54 | 54 |
| Overall Weight Loss kg | N/A | 1.5 | 2.6 | 3.4 | 4.1 | 4.1 | 4.4 | 5.1 | 5.7 |
Naturally me being me, I’ve started to let my ever worrying thoughts overtake my rational mind (no change there then) and have started to panic about what will happen after this transformation. What’s going to happen when this is all over? Will I know what to do? What if the gym is too busy and all the equipment I need is in use? Are there any exercises I can stick to if I do panic?
When voicing my concerns (during a very challenging training session) to personal trainer Mark Stanton, joint head of training and development at Transition Zone, he said that as long as I stick to the compound exercises then I have no need to panic. (You can follow Mark on Instagram: @insidetrack_pt)
This automatically caught my attention – what are compound exercises exactly? I think I have figured out Mark’s transformation secret…
Compound movements: your secret weight loss weapon
Want to lose weight at the gym and change your body shape? Then compound exercises are your friend because they work more than one muscle, usually a few, such as glutes, hamstrings, quads and core (all at once, hello timesaver). According to Mark, you should prioritise compound movements ‘for more bang for your buck during training sessions’.
To achieve fat loss you need to increase your muscle mass because the more muscle you have the more calories you will burn – simples. By working more than one muscle at the same time, you’re building more muscle faster.
From the get go Mark said that I would be doing mainly compound movements in upper body and lower body supersets. Supersets are doing two sets of exercises that use the same muscle group back to back.
‘Supersets enable us to keep the intensity high and help stimulate hormone release, which in turn will aid muscle growth and fat breakdown,’ explained Mark.
To achieve fat loss you need to increase your muscle mass
Compound movements work several muscles or muscle groups at one time. For example, a squat uses a number of muscles in the core, lower back and lower body including the quadriceps, hamstrings, calves and glutes – see, many different muscles being worked in one exercise.
Deadlifts and even push ups are compound movements for the same reason, they use a number of muscles, compared to a bicep curl which is an ‘isolated movement’ that would burn fewer calories.
Some other benefits of compound movements include: they usually burn more calories, they simulate real-world exercises and activities and are therefore functional movements that allow you to get a full body workout, they keep your heart rate up, providing cardiovascular benefits. Here are the five compound movements you need for fat loss.
Gym Move #1 Dead-lifts
Romanian Dead-lift
There are many variations of dead-lifts, ‘the Romanian is a slightly more isolated movement targeting the posterior chain [back of the body] which in turn aids strength in the dead-lift and the squat,’ explains Mark. ‘It was included in Olivia’s program to develop movement awareness, core control and posterior chain strength’.
To build muscle and to therefore lose weight, you must and I repeat must, make the dead-lift part of your strength training routine.
Before training at Transition Zone the only dead-lift I had tried before was a Romanian dead-lift. The Romanian deadlift (RDL) is a compound movement that uses multiple joints and muscle groups and mainly targets your glutes, hamstrings and core.
When doing a RDL correctly, it’s an excellent move to help build up lower body strength, as it works just about everything on the back side of your body (your posterior chain).
How to RDL: You’ll need a barbell.
1. Stand tall with your feet hip-width apart.
2. Hold a barbell in both hands directly in front of your thighs with your hands about shoulder-width apart or slightly wider than your thighs, with an overhand grip.
3. Start with a slight bend in your knees (soft knees). Roll your shoulders back and down (antishrug or set your shoulders as Mark would say), drawing your shoulder blades toward your spine – this will engage your upper back. Try to keep your shoulders in this position throughout the exercise.
4. Breathe in, brace your core muscles and push your hips backwards creating a hinge at your pelvis, so that your torso naturally begins to lean forward toward the floor (don’t bend from your waist, your spine should not change shape).
5. Keep the barbell close to your thighs, so that the bar is almost grazing the front of them, as you hinge forwards from the hips.
6. When you feel a stretch in your hamstrings stop hinging from the hips. The barbell does not have to touch the floor, that depends on your flexibility.
7. Breathe out and use your hamstrings and glutes to ‘pull’ your torso back to standing as you press your hips forwards.
Here’s me giving it a go…
https://www.instagram.com/p/BzIJ1mJHwtV/
Dead-lift
If you want a good bum this is the move for you. The dead-lift is a great way to build strong-looking legs and a great behind.
In a dead-lift, you lift the weight from the ground, to around thigh-level using your leg and hip muscles, but with the assistance of most of the other large muscles in your body. The dead-lift is usually performed with a bar and plates or a barbell but it can also be done with dumbells or kettle bells.
How to DL: You’ll need a barbell or two kettle bells (start light to begin with so you can focus on your posture).
1. Position your feet shoulder-width apart, with your toes under the bar. Point your feet straight ahead or angle them outwards slightly and keep you heels flat on the floor.
‘Foot position can vary depending on your mobility, limb length or target muscles,’ explains Mark. ‘For Olivia, she took a wider stance because I wanted to target the adductor (a skeletal muscle located in the thigh) to provide balance in her hips as they are hyper mobile’.
2. When you lift the bar it should stay close to your shins. Your head (and eyes) should reflect a neutral spine position. This is best done by looking at the floor just in front of you.
3. Brace your core. Squat down in front of the bar, bending at the knees.
4. Grasp the bar just outside of your knees with an overhand grip.
5. Lift the bar by pushing upwards with the legs from the knees, making sure the weight is in your heels (don’t try to haul the bar up with just your arms). Keep your arms extended gripping the bar as the legs push you up.
6. The bar should almost tough the shins and come to a stop at around thigh level. Pull your shoulders back without bending backwards.
7. Lower the bar to the floor in a reverse motion, making sure you are keeping a neutral spine.
Check out my dead-lifting skills..
https://www.instagram.com/p/BzIK3Sinh-2/
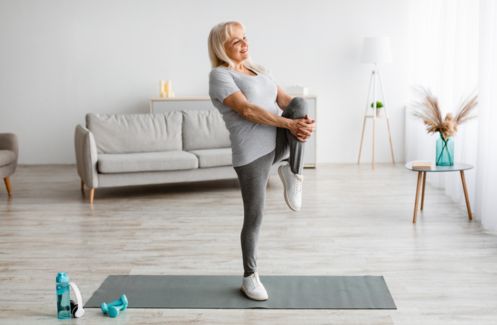
Gym Move #2 Squats
Now for my FAVE – squats. Squats aren’t only great because they work loads of muscles and give you a great bum, but there are SO many different squat variations you can do – you will literally never get bored of squats. But I would simply bore you if I listed them all here, so here are the main ones I have been doing with Mark at Transition Zone.
Goblet Squat
At the end of every warm-up and before every session Mark gets me to do goblet squats. One of the best things about the goblet squat is that it’s great for beginners and you can literally do it anywhere with a kettle-bell, dumbbell or just your own body weight.
All squats including the goblet squat are compound movements that target all the major muscle groups of the lower body.
How to Goblet Squat: Grab kettle-bell or dumbbell.
1. Have your feet slightly wider than hip-width apart, angling your toes slightly outwards.
2. Hold a kettle-bell/dumbbell in both hands at your chest, gripping the handles as if you were cupping a goblet with one hand on either side.
3. Brace your core, look straight ahead and keep your back straight.
4. Inhale and press your hips back and begin bending your knees to squat down.
5. Keep your chest up as you squat down. Keep the weight in your heels, and aim to have your hips just below parallel with your bent knees as low as you can maintain a neutral spine.
6. Exhale as you push up through your heels and reverse the motion to return to your stood-up starting position.
https://www.instagram.com/p/BzILYMgHW_a/
Hack Squat
Again before starting this body transformation I had never done a hack squat. Unlike the goblet squat this one is particularly difficult.
Another compound move, the hack squat targets your quadriceps, hamstrings and glutes. You can shift emphasis to particular muscles though by placing your feet further away from you or by taking a wider stance.
How to Hack Squat:
1. Place your back against the plate and lean backwards, hooking your shoulders under the shoulder pads provided.
2. Position your legs shoulder-width apart, with the toes slightly pointed out. Straighten your legs without locking the knees for your starting position.
3. Inhale, and begin to slowly lower yourself down by bending the knees, but keeping a straight posture with the head up and your back. Continue squatting down until the angle between the upper leg and the calves becomes slightly less than 90-degrees (parallel to the floor).
4. Make sure that your knee doesn’t track over your toes. If your knees go over your toes then you could cause stress on the knee, so be careful.
5. As you push up exhale by pushing the floor with mainly with the heels of your feet, as you straighten the legs again and go back to your starting position.
Some gyms have a specialist hacksquat machine but we had to improvise in the studio.
My attempt at a hack squat…
https://www.instagram.com/p/BzIMCVgHqdi/
Gym Move #3 Walking lunges
Okay, so a lunge is basically an exaggerated step, preferably backwards or walking. Lunges also can be done anywhere, with or without equipment and are a go-to for a good bum and strong legs. A lunge is a single-leg exercise that works your hips, glutes, quads, hamstrings, core, and some of the muscles in the inner thigh.
If you’re ready to ‘take the lunge’ here’s how to…
How to do a Walking Lunge:
1. Find an area with lots of space.
2. Grab some dumbbells of a weight that will enable you to stay balanced, start with a lighter weight. If you have difficulties with balance, start with no weights and just use your own body weight.
3. Stand up straight with a dumbbell in each hand and hang your arms at your sides. Have your palms facing inwards towards your thighs.
4. Your feet should be a little less than shoulder-width apart.
5 Take a big step forward with either leg, bending at the knee until the front thigh is parallel to the ground, landing on the heel.
6. Inhale as you lunge down. Don’t let the knee go past the tip of the toes and brace your core. A lot of people tend to lunge forward, so remember here that you’re aiming to lower your body weight downwards.
7. Exhale and step back to your standing starting position.
8. Repeat the motion with the other leg. Alternate between legs, try 12 lunges per set and two to three sets in a workout.
Here’s me taking the lunge…
https://www.instagram.com/p/BzIM21zHkTS/
Gym Move #4 TRX Row
Ah the TRX row. The gym move that looks oh so easy but is in fact ridiculously hard and I have had many tantrums when doing these – seriously.
The TRX Row is excellent for strengthening the upper back. This move mainly works the lats and other muscles in the back, but this exercise also strengthens your hand grip, your shoulders and your core.
If the TRX row becomes too easy (which is unlikely), you can add some difficulty by stepping forward and leaning back so that you are at more of an angle when pulling yourself up. The lower you get, the harder the exercise will be.
How to TRX Row:
- Shorten the TRX straps.
2. Set your body in a straight line and lean backwards.
3. While keeping your arms straight, walk your feet forwards until there is tension in the straps. The more forward your feet the harder it will be because you will be lifting more of your own weight.
4. To begin the movement, pull yourself upwards, pinching your shoulder blades together at the top of the pull up, keeping your elbows close to your body.
5. Keep your body rigid and your palms and wrists should stay neutral, don’t bend or twist them.
6. Lower your body back down to the leaning starting position and repeat the movement.
Here’s me doing a TRX Row without throwing a tantrum (a rare sight)…
https://www.instagram.com/p/BzINttun95D/
Gym Move #5 Push Ups
I am one of those annoying girls who claims she can only do one push up – typical girly girl. But over the past eight weeks at Transition Zone, I think Mark has made it his secret mission to get me to do more than one push up, progression and all that – we literally do these in every single session.
To make it easier or to train me up if you like, Mark gets me to practice my push ups on a barbell attached to a squat rack. You could use a sofa, coffee table, park bench or step for some elevation.
Barbell push-ups/push-ups is an exercise that mainly targets the chest and triceps, but also engages the abs and shoulders.
Here’s how that works if your’re slightly confused…
How to push up on a barbell:
1. Secure a barbell at hip height in a squat rack, this is slightly easier, or closer towards the floor, making it slightly harder. Without moving the bar, grab it with both hands, slightly wider than shoulder-width apart.
2. Get into push up position but place your hands on the bar instead of on the floor, like you would during a standard push up. Your body should form a straight line from your head to your heels, keep your head in line with your spine.
3. Brace your core and squeeze your glutes.
4. Lower your body until your chest almost touches the bar, pause, and then push yourself back up as quickly as possible.
‘Your shoulders should stay down away from the ears and your shoulder blades should be squeezed together all the way down into the press and stay squeezed together as you come up,’ explains Mark, ‘Your strength comes from a strong braced core in this exercise which is why I prefer the barbell option to kneeling press ups which do not challenge the core position enough, this is why many people can smash out knee press ups but never get a full press’.
And here is me demonstrating if you’re still confused…
https://www.instagram.com/p/BzIOVFyH8e6/
Things I have learnt this week:
1. Lifting weight makes you feel BAD ASS (in an American accent of course)
Seriously every week when Mark says I have lifted heavier than the week before I feel so happy with myself. We take progression for granted because we don’t actually realise how much we have improved compared to when we start out.
But looking back at older videos, I am always amazed, not only because I look different, but also how I perform the exercises so much better, to the point where I make it look easy (it wasn’t of course, but the fact I make it look that way has got to mean something right)?
2. Even stretchy leggings can become loose when you lose weight
Not to brag, but even my tight and stretchy leggings are now loose on me. I didn’t even know leggings could be loose but they are and I’m very very happy about that – my bank account totally isn’t though…
Come back every week to read Olivia’s week by week diary of her weight loss transformation with Mark Stanton and Emma Bardwell at Transition Zone.
Get 15% off Personal Training at Transition Zone – Register your goals and quote HEALTHISTA
For a free 15 minute introductory call to talk about goals, symptoms and expectations click here. And for new client offers click here. Follow Transition Zone on Instagram or see their website and latest newsletter for more information.
More Healthista Content:
30 Day Yoga Challenge – Day 16 – Half Moon Pose
Calling all women travellers – you can’t miss this event
5 natural fixes for joint pain proven by science
The vaginal condition you’ve never heard of – that’s more common than thrush
Like this article? Sign up to our newsletter to get more articles like this delivered straight to your inbox.