Looking for healthy recipes that help you get the nutrients you need to balance your hormones at different times of the month? New book, The Happy Balance![]() has all you need
has all you need
The waxes and wanes of your monthly cycle require different nutrients to keep your body at optimal health, say the authors of a new book The Happy Balance: The original plant-based approach for hormone health – 60 recipes to nourish body and mind![]() , Megan Hallett and Nicole Jardim. Their recipes they claim, will help the symptoms associated with hormonal imbalance such as weight gain and skin problems, through nutritious plant-based recipes.
, Megan Hallett and Nicole Jardim. Their recipes they claim, will help the symptoms associated with hormonal imbalance such as weight gain and skin problems, through nutritious plant-based recipes.
Symptoms of hormonal imbalance include skin problems, lower energy and sex drive, weight gain and worsened PMS symptoms. If you suffer from any of the above issues – these recipes can help.
The recipe book also includes a guide to understanding your hormones, and how to maximize health at each stage of life – from puberty through menopause. Each recipe is packed full of nutrient-rich ingredients that will support your body through its fluctuating hormone levels.
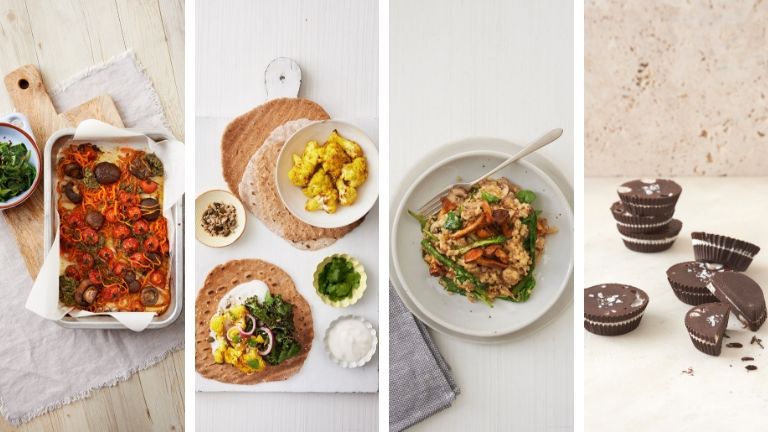
We have chosen a day’s worth of healthy meals that will help nourish the body at every stage of its monthly cycle. The recipes are marked with which phase of your cycle they are best for: Follicular phase (after your period ends), ovulatory phase (when your ovaries release an egg), luteal phase (after ovulation, when the egg has not been fertilised) or menstrual phase (your period).
Healthy breakfast recipe: Veggie Tray Bake
Best for: Menstrual Phase
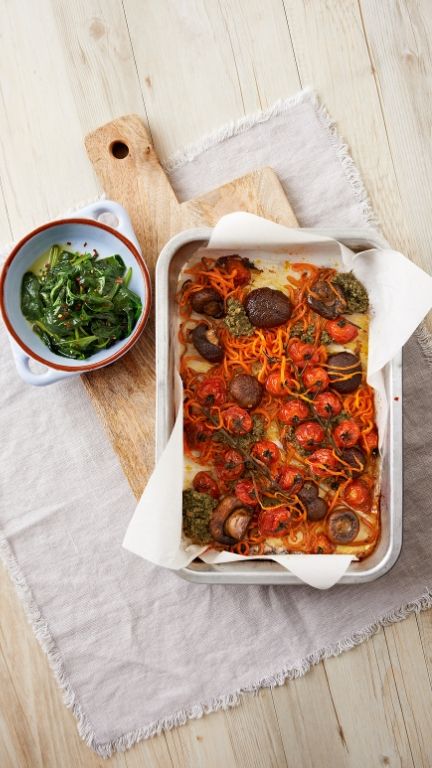
While pancake stacks and sweet bowls of filling porridge are all well and good, there is a lot to be said for a full English veggie breakfast. The kind of veggie breakfast where each individual component really holds its own and is full of flavour and sustenance.
Slow-roasted vine tomatoes, doused in rich olive oil, really are as glorious as they sound, and become ever so soft and juicy when cooked in this way. Eat them alongside crispy tangles of sweet potato for an easy alternative to hash browns, and a creamy side of sliced avocado – a savoury brunch superhero if there ever was one.
Serves 2
Prep: 10 minutes
Cook: 30 minutes
Ingredients:
- 240 g (8 1⁄2 oz) cherry tomatoes (ideally still on the vine)
- 200 g (7 oz) chestnut mushrooms
- A generous drizzle of extra virgin olive oil
- 2 small sweet potatoes (about 130 g/4 oz each)
- A sprinkle of dried chilli flakes
- 2 tsp Brazil Nut Pesto (see below)
- 1 garlic clove, minced
- 2 generous handfuls of spinach
- 1 ripe avocado, peeled, stoned and sliced
- 2 tbsp Homemade Hummus (see below)
- Salt and black pepper
Method:
1. Preheat the oven to 180°C/350°F/gas mark 4. Line your baking tray with a sheet of baking parchment.
2. Place the cherry tomatoes and whole chestnut mushrooms on a large baking tray with a generous drizzle of olive oil and season with salt and pepper. Bake for 10 minutes.
3. Cut the sweet potatoes lengthways, so that they are thin enough to fit into your spiraliser with ease. Spiralise them, then toss the potato noodles with a touch of olive oil and some chilli flakes before placing on the tray with the tomatoes and mushrooms. Cook everything for a further 20 minutes.
4. With roughly 5 minutes to go, add a dollop of pesto on top of the tomatoes, and heat a medium pan with a drizzle of olive oil. Add the garlic and spinach to the pan, allowing it to completely wilt down. Plate up all the cooked components and finish with a side of sliced avocado and a dollop of hummus.
For the pesto:
Makes 1 small jar
Prep: 5 minutes
- 70 g (1⁄2 cup) brazil nuts
- A generous handful of basil
- 80 ml (1⁄3 cup) extra virgin olive oil
- 1 garlic clove, smashed
- 2 tbsp nutritional yeast (optional)
- A light squeeze of lemon juice
- Salt and black pepper
1. Place all the ingredients in a food processor or blender and blitz until everything is combined and the brazil nuts are completely broken up. Feel free to add a touch more oil if you like a runnier pesto. Keeps for up to five days in a sealed container in the fridge.
For the hummus:
Makes 1 small bowl
Prep: 10 minutes
- 400 g (14 oz) can chickpeas
- 1 tbsp tahini
- 1⁄2 tsp ground cumin
- 120 ml (1⁄2 cup) extra virgin olive oil
- 1 garlic clove
- A squeeze of lemon juice
- Salt and black pepper
1. Start by draining and thoroughly rinsing the chickpeas. Next remove the skins by gently pinching the edges and letting the chickpeas pop out. This will give an extra smooth hummus.
2. Place the skinned chickpeas in a food processor or blender along with the remaining ingredients and blitz until smooth. This may take a couple of minutes or so, depending on desired consistency. Keeps for up to five days in a sealed container in the fridge.
Healthy breakfast recipe: Overnight Teff Bowl with Chia Jam
Best for: Ovulatory Phase

Teff — an Ethiopian grain — should be a staple in any hormone-healthy diet and it’s subtle, delicate flavour makes it super versatile to cook with. From thick chocolate pancakes served with juicy cherries, to this quick and easy, tummy happy, overnight porridge.
It’s high in iron, magnesium and zinc – all key nutrients for optimal hormone health. Teff is also known for being fibre rich, promoting a healthy, thriving environment in your gut, vital for a flourishing body and happy mind.
Paired with high-fat probiotic coconut yogurt, this recipe will help banish any unwelcome bloat from slightly out of whack hormones, boost energy levels and the immune system, setting you up for whatever the day may throw at you.
Serves 1
Prep: 5 minutes, soaking overnight
Ingredients:
- 120 ml (4 1⁄2 oz) (roughly 1⁄2 cup) dairy-free coconut yogurt
- 50 g (1⁄4 cup) teff grain
- 1 tbsp milled flaxseeds
- 1⁄2 tsp ground cinnamon (preferably Ceylon)
- A fistful of fresh raspberries
- 1⁄2 tbsp chia seeds
- 1 tbsp nut butter of choice
Method:
1. Measure out the coconut yogurt in a bowl and add the teff, flaxseeds and cinnamon. Give everything a good mix before transferring into a jar to stand overnight.
2. The next morning, make a quick chia jam by mashing the raspberries together with the chia seeds and allowing to sit for five minutes. Spoon the jam onto the soaked teff, to serve, and finish with a generous spoonful of nut butter, if you wish.
Healthy lunch recipe: Spelt Flatbread with Turmeric Roasted Cauliflower and Black Quinoa
Best for: Follicular Phase

Spelt is a truly marvellous ancient grain, with a delicate and nutty flavour. Packed with protein it provides a prolonged release of energy, instead of instantly spiking blood sugar.
There are two different ways to cook this beautiful cruciferous vegetable for this recipe: baking cauliflower leaves it ever-so-slightly crispy on the edges, yet with a lovely roasted flavour on the inside.
On the other hand, boiling lightly – until it’s soft enough to stick your fork through – before chargrilling, leaves it lighter with a slightly charred flavour. Both methods make this sometimes tricky vegetable shine.
Serves 2
Prep: 20 minutes, plus soaking overnight
Cook: 30 minutes
Ingredients:
- 400 g (14 oz) cauliflower, chopped into florets
- A generous drizzle of extra virgin olive oil or avocado oil
- 1 tsp ground turmeric
- 1⁄2 tsp ground cumin
- 80 g (3 oz) black quinoa (ideally soaked overnight in cold water)
- A few generous handfuls of cavolo nero or any other leafy green
- 1 tbsp Brazil Nut Pesto (see Veggie Breakfast Traybake)
- A generous dollop of dairy-free coconut yogurt
- 25 g (1 oz) pumpkin seeds, toasted
- 25 g (1 oz) sunflower seeds, toasted
- 2 tbsp of fresh coriander, chopped, to serve
- 1 tbsp pre-made pink pickled onions, to serve (optional)
- Salt and black pepper
For the flatbreads:
- 200 g (2 cups) sprouted spelt flour
- 2 tbsp dairy-free coconut yogurt
- 1 tbsp extra virgin olive oil
- A pinch of salt
Method:
1. Preheat the oven to 200°C/400°F/gas mark 6. Line a baking tray with baking parchment. Spread out the chopped cauliflower on the tray and drizzle with oil. Sprinkle with the turmeric and cumin and season generously with salt and pepper. Using your hands, rub the seasoning all over the cauliflower and then bake for 20 minutes until golden and crispy.
2. Place the quinoa in a saucepan with double the amount of boiling water and leave to simmer away for 15–20 minutes.
3. Make the flatbreads by combining all the ingredients with 4 tbsp cold water in a large bowl and kneading with your hands until the dough holds together well. Add a touch more water or flour to reach the desired consistency if needed. Roll out into two individual flatbreads on a floured surface, then rest on an open flame on the stove top to cook, constantly turning, until each surface catches slightly.
4. Once the quinoa is cooked and absorbed all the water, add the leafy greens and stir in the pesto. Assemble your flatbreads by smothering them with the coconut yogurt then topping with quinoa and leafy greens and turmeric cauliflower. Finish with a sprinkling of toasted seeds, fresh coriander and a few slices of pink pickled onion on each.
If you would prefer, you can boil the cauliflower in a saucepan for about 5 minutes until you can easily stick a fork through it. Drain, brush it with the oil, turmeric and cumin and place it on a griddle pan over medium/high heat to chargrill for at least 10 minutes.
Healthy dinner recipe: Chanterelle Mushroom Asparagus Risotto with Cashew Cream
Best for: Luteal Phase
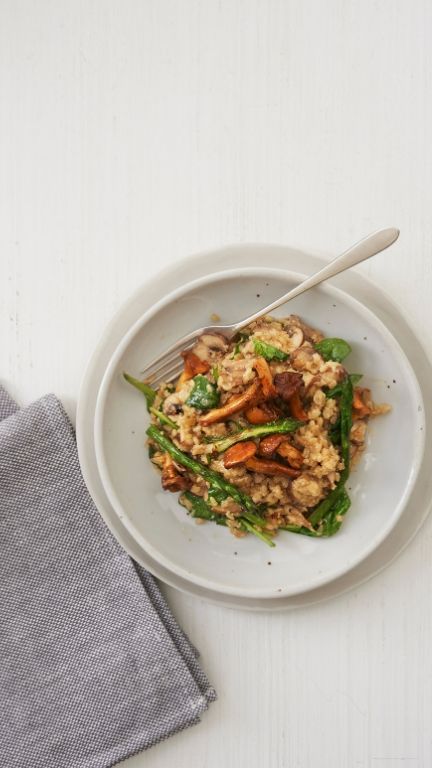
I try to eat seasonally where possible, for a number of reasons, the main one being taste. Take asparagus, for example. During asparagus season, you’ll see thick green spears wrapped tightly in colourful rubber bands everywhere you look.
When cooked right, they are juicy yet maintain a slight crunch at the same time. Slice into fine ribbons and toss into a creamy jumble of short-grain brown rice, meaty golden chanterelles, seasonal greens and you have yourself a wholesome, healthy risotto.
Packed full of vegetables and with the addition of cashew cream, it’s high-fat and anti-inflammatory due to an abundance of greens.
Serves 2
Prep: 15 minutes, plus soaking overnight
Cook: 55–60 minutes
Ingredients:
- 200 g (1 cup) short-grain brown rice (ideally soaked overnight in cold water)
- 600 ml (2 1⁄2 cups) boiling water
- 1 vegetable stock cube or 1 tbsp of veggie stock powder
- 50 g (1⁄2 cup) cashews (soaked for at least an hour)
- 4 tbsp nutritional yeast
- Avocado or coconut oil, for cooking
- 1 onion, finely chopped
- 1 large garlic clove, minced
- 125 g (4 1⁄2 oz) chestnut mushrooms, sliced
- A generous pinch of thyme sprigs
- 100 g (3 1⁄2 oz) asparagus, sliced in half lengthways
- 100 g (3 1⁄2 oz) chanterelle mushrooms (or any other wild mushroom), washed and dried
- 2 handfuls of seasonal leafy greens
- Salt and black pepper
- Crushed roasted hazelnuts and a drizzle of extra virgin olive oil, to serve
Method:
1. Rinse the soaked rice thoroughly and place it in a saucepan with the boiling water and the stock cube. Bring back to the boil over a medium heat and then leave to simmer for 40 minutes, until all the water has been absorbed.
2. Place the soaked cashews in a food processor or blender along with the nutritional yeast and about 100 ml (scant ½ cup) water. Blend until completely smooth and a lump-free cream forms.
3. Just before the rice has finished cooking, heat a second pan and add a dash of oil. Throw in the onion and garlic. Give them a few minutes to cook down, letting the onion brown slightly. Add the chestnut mushrooms and thyme.
4. Give the mushrooms a moment to cook before adding the asparagus ribbons – they should catch slightly and start to brown. Add the chanterelle mushrooms.
5. Throw in the cooked brown rice, cashew cream and seasonal leafy greens. Season generously with salt and pepper to taste. Cook for another 5 minutes or so and feel free to add a touch more water if needed. Serve with the crushed roasted hazelnuts dropped on top and a drizzle of olive oil.
Healthy snack recipe: Coconut Butter Cups
Best for: Luteal Phase

I like my snacks full of fat to keep me full and focused throughout the day, but most importantly, to rival the taste of anything I could buy in a shop. When you munch on foods you actually want to eat, as opposed to simply eating to fuel the latter part of your day, eating well becomes a lot less complex.
Take these coconut butter cups, for example. The sheer pleasure that comes from eating a wonderfully creamy layer of pure coconut butter, sandwiched between rich dark chocolate, is unbeatable. They’re nourishing and full of those good for you nutrients that’ll ensure stabilised blood sugar when you need it most.
Makes 12 cups
Prep: 5 minutes, plus 15 minutes setting
Cook: 5 minutes
Ingredients:
- 200 g (7 oz) good quality dark chocolate (85% cocoa solids)
- 12 tbsp coconut butter, softened
- Sea salt flakes
Method:
1. Line a 12-hole cupcake tin with cupcake cases.
2. Melt the dark chocolate in a small bowl over a pan of simmering water. Spoon a tablespoon of the melted chocolate into each cupcake case, then transfer to the fridge for 15 minutes or so to harden.
3. Once the first layer has set, spoon over a tablespoon of softened coconut butter into each before covering with the remaining melted chocolate and a pinch of sea salt to finish. Store in the fridge for 1 hour to set.
 All recipes have been extracted from The Happy Balance (2019, White Lion Publishing, £20) by Megan Hallett (right) and Nicole Jardim (left).The book is available on Amazon
![]() .
.
More Healthista Content:
Obsessed with peanut butter? You’re SO not alone
3 healthy recipes using CBD oil – yes CBD oil
3 easy vegetarian dinners to impress your friends this weekend
Like this article? Sign up to our newsletter to get more articles like this delivered straight to your inbox.