Chocolate pudding, jam role-poly, Tiramisu – it’s impossible to make these dessert recipes dairy-free right? Wrong. Julia Thomas’s gorgeous new book Free from Desserts will change your mind – here are our four favourite dairy-free dessert recipes from it
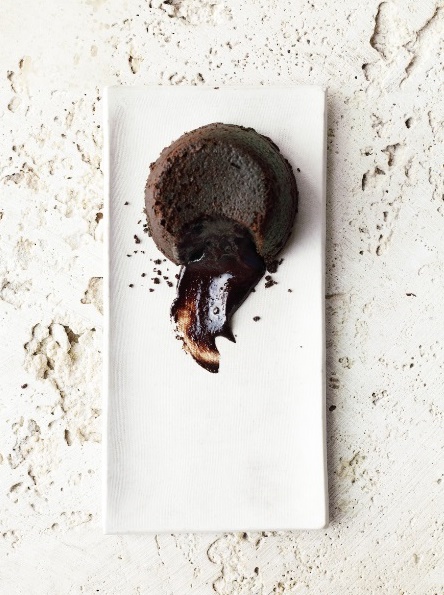
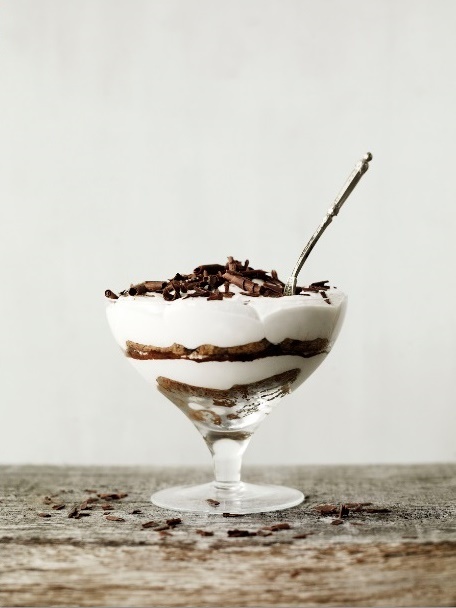
Tiramisu
This is a real blast from the past that still tastes exceptionally good today. Over the years I have searched high and low for a dairy-, wheat- and gluten-free alternative to lady’s fingers, but to no avail, so to keep my options open, I try to keep a bag of homemade ones in the freezer, then with a bit of forethought and a carton of ready-made custard I can have a Tiramisù chilling in the fridge within 30 minutes.
Serves: 4
Preparation time: 20 minutes, plus minimum 3 hours chilling (the longer the better)
Ingredients
50g dairy-free sour cream
60g coconut cream
250g shop-bought dairy-free custard
½ tsp vanilla extract
3 tbsp Marsala or brandy
1 tbsp unrefined icing sugar
150ml espresso, cooled
16–18 Lady’s Fingers
1 tbsp cocoa powder
25g best-quality (60% cocoa) dark
dairy-free chocolate, shaved into curls
Method
Put the cream cheese, sour cream, coconut cream, custard, vanilla extract, Marsala or brandy, icing sugar and 1 tablespoon of the cold espresso into a large mixing bowl.
Using an electric hand mixer, beat for a couple of minutes until light, smooth and creamy.
Dip one third of the Lady’s Fingers into the remaining espresso, making sure not to get them too soggy, then use to line the base of the serving dish, packing them in and if necessary, cutting them in half so they fit snuggly. Tiramis. is as much about the coffee-soaked sponge as the Marsala-flavoured cream.
Spoon over one third of the cream mixture, then sprinkle with some of the cocoa powder.
Repeat the process with second and third layers.
Chill in the fridge for at least 3 hours, but longer if you can so that the flavours really get a chance to develop.
Remove from the fridge and sprinkle with chocolate curls.
TIP If chocolate curls are proving elusive, you can grate the chocolate over the top or sift 2 tablespoons cocoa powder.
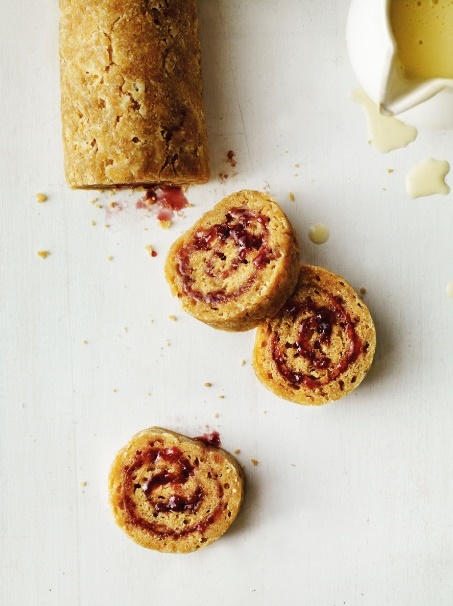
Raspberry Jam Roly-poly
The addition of ground almonds in this recipe adds just enough lightness and richness to the pastry without changing the taste and texture too much. If, however, you are a pudding puritan or you don’t like almonds, substitute them for the same weight in extra self-raising flour.
Serves: 6
Preparation time: 20 minutes
Cooking time: 1 hour
Dairy-free spread, for greasing
150g wheat- and gluten-free self-raising flour, plus extra for dusting
100g ground almonds
1 tsp xanthan gum
¼ tsp salt
125g wheat- and gluten-free vegetarian suet
50g coconut palm sugar
8–10 tbsp water
3 heaped tbsp raspberry jam
Method
Preheat the oven to 200°C/180°C fan/Gas 6.
Cut out a sheet of baking parchment big enough to wrap your 30 x 20cm roly-poly in, and one the same size of foil. Lightly grease the baking parchment and set both aside.
Place a roasting rack in a roasting tin and fill with water to the level of the rack.
Sift the flour, ground almonds, xanthan gum and salt into a large mixing bowl, add the suet and sugar and mix together well.
Add just enough water to create a soft, but not sticky, dough.
Place a large piece of clingfilm on a work surface and dust with flour.
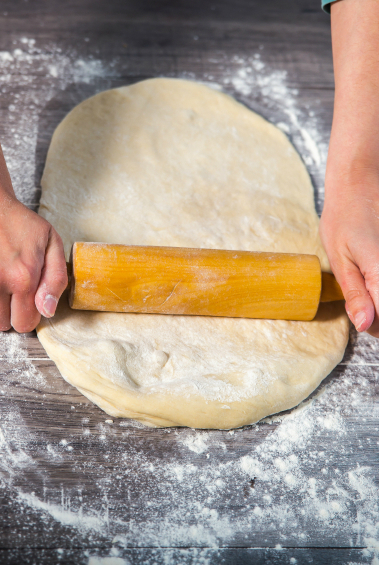
Turn the dough out onto the floured cling film and gently shape into a rectangle. Place another large piece of cling film over the top and, using a rolling pin, carefully start to roll the dough out into a rectangle about 20 x 30cm. Remove the top layer of clingfilm and, using a sharp knife, trim the edges of the dough to neaten.
Spread the jam evenly over the surface, leaving a 1cm clear border on 3 sides and a 2.5cm border on the short edge furthest from you (to prevent the jam spilling out when it is rolled).
If, however, you are a pudding puritan or you don’t like almonds, substitute them for the same weight in extra self-raising flour
Using the clingfilm underneath to help you, roll up the roly-poly tightly, starting from the short end nearest to you and ending with the join underneath. If any jam seeps out, scrape it off using a knife.
Lift the roly-poly onto the greased baking parchment, carefully sliding the clingfilm out from underneath.
Roll up in the baking parchment, not too tightly as it will swell slightly during cooking. Secure the ends, then wrap in the foil, again not too tightly and securing the ends so that steam and water can’t get in.
Gently place the wrapped roly-poly on the roasting rack and transfer the roasting tin to the oven.
Bake for 1 hour, then remove from the oven and leave to stand for 5 minutes before removing the foil and baking parchment, taking care of trapped steam escaping, which will be very hot.
Cut into slices and serve with lashings of warm Vanilla Custard.
TIP Don’t be tempted to put more jam in the roly-poly than recommended, as it will just seep out and make a mess. If you want a bit more sweetness, gently heat some extra jam in a small saucepan to pour over the cooked roly-poly.
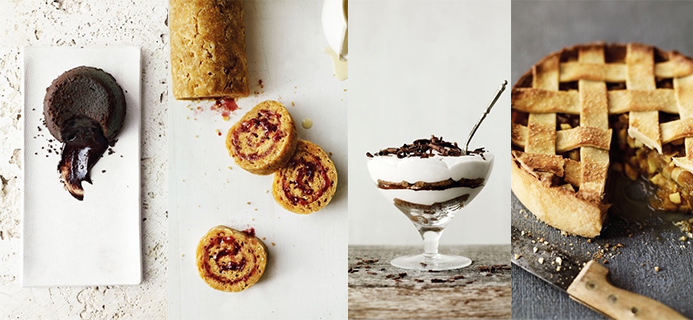
Warm and Gooey Chocolate Fondant Puddings
These wonderful little puddings never fail to amaze, and by popular demand feature regularly at my supper table. For puddings so delicious and impressive they are incredibly easy to make; just don’t be tempted to leave them in the oven a minute longer than I tell you.
Serves: 6
Preparation time: 30 minutes
Cooking time: 8–9 minutes
Ingredients
Dairy-free spread, for greasing
2 tbsp cocoa powder
Fondant Puddings
125g best-quality (60% cocoa)
dark, dairy-free chocolate, broken into pieces
125g dairy-free spread
4 large eggs
75g unrefined icing sugar, sifted
50g wheat- and gluten-free self-raising flour
35g cocoa powder
Method
Preheat the oven to 180°C/160°C fan/Gas 4.
Grease the pudding basins or moulds with dairy-free spread and dust the insides with the cocoa powder.
Melt the chocolate and dairy-free spread in a heatproof bowl set over a pan of barely simmering water, making sure the base of the bowl doesn’t touch the water or the chocolate will seize.
Stir until combined, then remove the pan from the heat and the bowl from the pan. Set aside to cool a little.
Whisk the eggs and icing sugar together in a bowl with an electric hand mixer until light and foamy, 3–4 minutes.
Using a large metal spoon, gently fold the egg and sugar mixture into the cooled chocolate mixture, then sift in the flour and cocoa powder and carefully fold until combined.
These wonderful little puddings never fail to amaze, and by popular demand feature regularly at my supper table
Spoon the mixture evenly into the prepared basins and place them on a baking sheet. Bake for 8–9 minutes. They should rise nicely but have a soft and runny centre.
Using a flat-bladed knife, gently loosen each fondant from the sides of the basin, and carefully turn out each onto a serving plate.
Serve with Coffee Creme Anglaise for a wonderfully sophisticated dessert, or work the 1970s vibe and serve with Madagascan Vanilla Ice Cream and cherries soaked in Kirsch (found in good delis and at Christmas time in the major supermarkets).
TIP If you are serving these at a dinner party, they can happily be made the day before and chilled in the fridge overnight. Pop them into the oven just before serving.
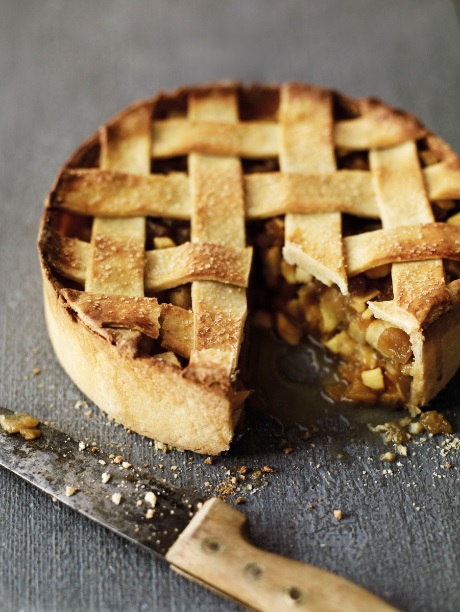
Proper Apple Pie
Everyone I know loves apple pie, so they certainly don’t need to be reminded of its merits. For good measure, though, this apple pie is seriously good and everyone should make it!
Serves: 6–8
Preparation time: 1 hour plus minimum 1 ½ hours chilling
Cooking time: 45–50 minutes
1 quantity Sweet Shortcrust Pastry (see below)
1 egg, beaten with 1 tbsp soya, rice, almond or coconut milk
Unrefined granulated sugar, to sprinkle
Filling
750g Bramley apples
750g Cox’s apples, peeled, cored and chopped into 1cm chunks
1 tbsp dairy-free spread
1 cinnamon stick
6 cloves
100g light muscovado sugar
1 tbsp wheat- and gluten-free plain flour
1 tbsp unrefined demerara sugar
Juice of ½ lemon
Apple Sauce Liquor
Peel and cores from the Bramley apples
500ml apple juice
100g unrefined castor sugar
Method
Make the pastry, wrap in clingfilm and chill in the fridge for at least 1 hour, or overnight if possible.
Divide the chilled pastry into two pieces – three quarters and one quarter. Wrap and chill the small piece, and roll out the larger piece to a circle 5mm thick.
Use to line the springform tin, then lightly prick the base with a fork and chill in the freezer for 30 minutes.
Meanwhile, preheat the oven to 190°C/170°C fan/Gas 5.
Blind bake the pastry case – lightly prick the base with a fork and chill in the freezer for 30 minutes. Meanwhile, preheat the oven to 190°C/170°C fan/Gas 5 and place a baking sheet in the oven to heat.
Line the pastry case with baking parchment and ceramic beans. Bake in the oven on the hot baking sheet for 15 minutes or until the pastry is starting to turn golden.
Remove the tart from the oven and lift the parchment and ceramic beans out; take care, as they will be very hot
Reserve the remaining beaten egg and milk mixture for the pie top, later.
Meanwhile, peel, core and chop the Bramley apples into 1cm chunks.
For the apple sauce liquor, put the peel and cores in a saucepan, add the apple juice and sugar and simmer for 20 minutes. Remove from the heat, strain and return to the pan to reduce for 10 minutes.
this apple pie is seriously good and everyone should make it!
Put the dairy-free spread into a large saucepan, add the cinnamon and cloves and gently melt the spread over a low heat. Add the muscovado sugar and stir to mix.
Add the chopped Bramley apples and cook for a few minutes over a high heat until the juices start to run, then cover, reduce the heat and cook for 10–15 minutes.
Remove the cinnamon stick and stir the apples vigorously a couple of times until they disintegrate into a puree. Remove from the heat and leave to cool.
Sprinkle the base of the pastry case with the flour and demerara sugar.
Stir the lemon juice and 50ml of the apple sauce liquor (reserve the rest) into the Bramley puree before adding the chopped Cox’s.
Pour the apple mixture into the pastry case.
Roll out the remaining pastry and cut out 8 or 10 strips, 2.5cm wide.
Place across the top of the pie in an interwoven criss-cross pattern.
Pinch the strips to the edge of the pastry case. Brush the pastry with the beaten egg and milk mixture, then sprinkle with granulated sugar.
Bake in the oven for 45–50 minutes or until the top is crisp and golden brown. Leave to cool for 10 minutes before releasing from the tin.
Serve warm with Walnut Praline Ice Cream and the apple sauce liquor.
Sweet Shortcrust Pastry
I normally make at least double the quantity of sweet shortcrust pastry I actually need and freeze the rest. Most of my recipes require half the quantity of pastry this makes, so if you aren’t going to bake again for a few days, wrap the remaining dough in clingfilm, pop it into a freezer bag and freeze. Always keep all pastry ingredients as cool as possible. If the fat starts to melt in the dough before it is cooked, your finished pastry will be tough.
Makes: 710g, enough to line two 20–23cm tart tins, 12 individual 10cm tins or
two rectangular 36 x 12 x 2.5cm tins
Preparation time: 15 minutes
Chilling time: Minimum 1 hour, but preferably overnight
340g wheat- and gluten-free plain flour
2 tsp xanthan gum
¼ tsp salt
60g chilled vegetable lard, cubed
65g chilled dairy-free spread, cubed
125g unrefined caster sugar
2 large eggs plus 1 large yolk
Method
Keep all your ingredients as cool as possible. If the fat starts to melt in the dough before it is cooked your finished pastry will be tough.
Sift the flour, xanthan gum and salt into a large bowl or the bowl of a food processor.
Add the chilled vegetable lard and dairy-free spread cubes and lightly rub in using your fingertips, or gently pulse in the food processor, until the mixture looks like fine breadcrumbs. Thirty seconds should be enough in the food processor and 1–2 minutes by hand.
If using a food processor, tip the mixture into a large mixing bowl.
Add the sugar, stir to combine, then make a well in the centre. Beat the eggs and yolk together and pour into the well.
Mix together lightly using a palette knife and then, using your hands, gently gather the pastry together to form a dough. Don’t worry if it appears a bit dry; it will gradually come together, so don’t be tempted to add more liquid, which would make the dough tough.
Handling the dough as lightly and as little as possible, so without kneading it, flatten it into a disc, wrap in clingfilm and chill in the fridge for at least 1 hour, but preferably overnight. If you are only going to use half, divide the dough into two, put one wrapped disc in a freezer bag and freeze.
TIP To make lemon shortcrust pastry, add the finely grated zest of 1 lemon and juice of half to the eggs.
Extracted from new book: Free from Desserts: Pies, Puddings & Ice Creams All Without Dairy, Wheat and Gluten by Julia Thomas (Quadrille, £20) Photography by Andrew Montgomery.
3 dairy-free recipes you won’t believe contain no milk
Like this article? Sign up to our newsletter to get more articles like this delivered straight to your inbox.


