Sauerkraut and kefir are earning their health reputation as gut-friendly foods amongst many sour tasting delicacies. Alana Holloway, founder of subscription box Fermented by LAB, shares a beginner’s guide to fermenting foods at home
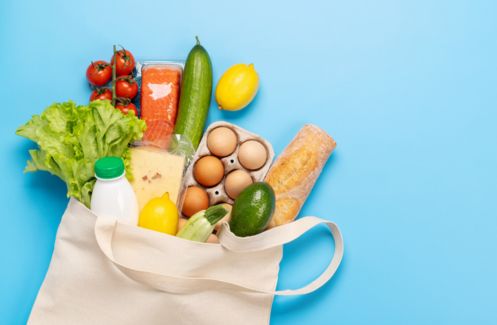
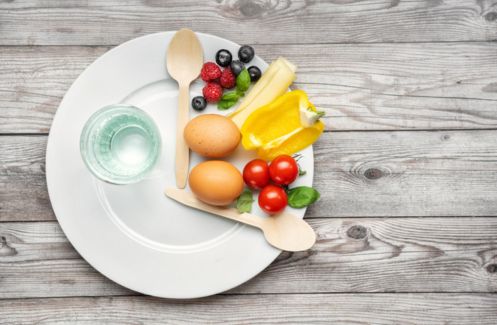
It’s the buzzword that makes people pull a ‘ew’ sort of face. ‘Fermented foods’, however, are present in most people’s everyday diet in the form of yoghurt, bread, cheese and alcohol. It’s recently made a fashionable comeback in the form of drinks such as kombucha and kefir as the scientific evidence behind the importance of gut health grows. Fermented foods are rich in probiotics, which research is showing has a great impact on the bacteria in our intestinal flora and therefore our digestive and immune systems.
Fermented foods are rich in probiotics, which can have a great impact on bacteria in intestinal flora and digestive and immune systems
The bacteria in our gut plays a huge role in the function of our bodies, and when the balance shifts towards an overgrowth of bad bacteria, symptoms such as bloating, constipation or diarrhoea can occur. In modern life, busy, stressful and sugary diets are what bad bacteria flourish on.
‘For conditions like eczema, an autoimmune disease, or inflammatory conditions, ferments reduce your inflammation and improve health generally’, says Alana Holloway from Fermented by LAB, the UK’s first fermented foods subscription box. She began fermenting in 2011 when she learnt to manage her chronic full body eczema by nurturing her gut.
Realising the countless benefits of adding sauerkraut and kimchi to her diet, she began encouraging others with workshops. She was soon developing the box service further to make her delicious ferments available to more people.
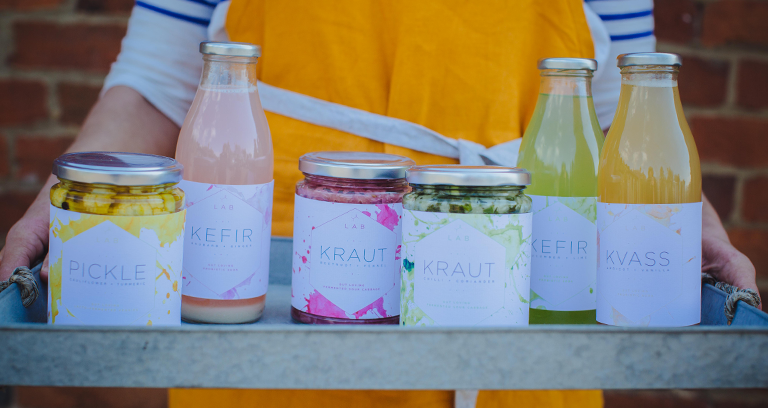
The new monthly box contains jars and drinks amounting to a daily dose of gut loving food, including sauerkraut, kefir, pickle and kvass, and change according to seasons.
‘There will always be bad bacteria. But it’s so important to keep the levels balanced because your gut bacteria communicate with your immune system and helped it to realise what’s friend and foe’, says Alana.
What are fermented foods?
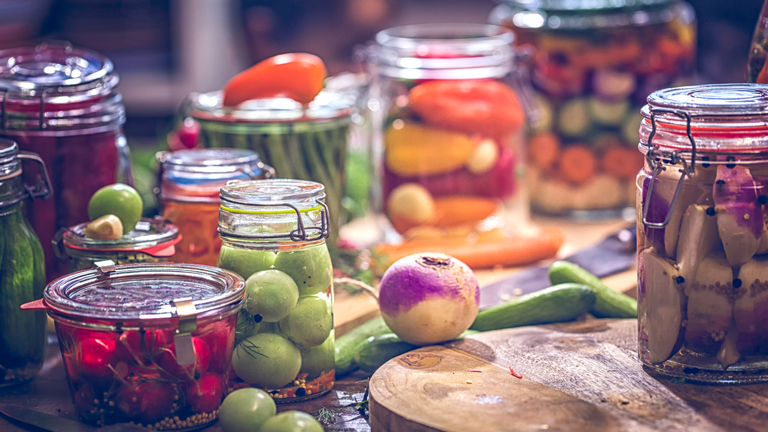
TV adverts have for a long time encouraged a shot of probiotic yoghurt in the morning. But a jar of cabbage fermenting on your windowsill at home is argued to be much richer in probiotics (let alone more hip). Historically, the process goes back centuries ago when refrigerators didn’t exist and food and drink was preserved, in many different cultures.
Typically, vegetables are packed into a jar which is filled with a salty brine. The bacteria that is present inside and on the skin of the vegetables flourish, feeding on the sugar and starch in the food, creating lactic acid (not lactose). This preserves the food and creates beneficial enzymes, B-vitamins, Omega-3 fatty acids and strains of probiotics, giving it its super-food label. Be warned however, as the taste can be a little funky and sour, so a little goes a long way when added to a meal.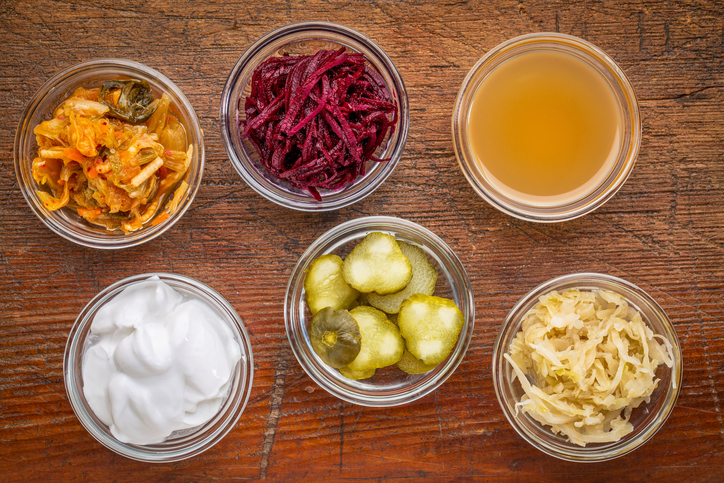
How often should you eat fermented foods?
Koreans have been eating kimichi with every meal for years. ‘They have one of the lowest amounts of chronic disease in the world. So there is something to be said for that’, says Alana. However, if you are new to ferments, it is advised to try a small amount every other day. To avoid shocking the system, gradually increase the amount so you are eating a little every day. ‘Raw is the best way to eat it, when it is richest’, says Alana. ‘You may use the kraut juice to make a mayonnaise or even shot it in the morning, if you are brave.’
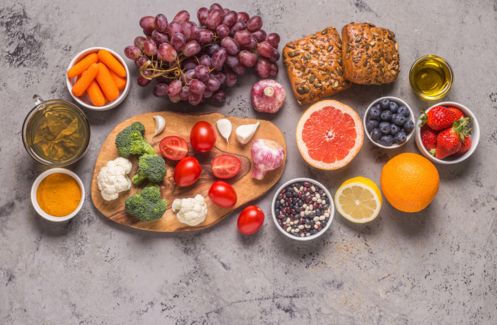
Fermented foods to look out for
Although drinks such as beer are technically in the fermented list, they don’t quite have the same healthy tag. The following top fermented foods are natural sources of good-bacteria boosting agents:
- Kefir – A probiotic cultured drink either as water or milk containing multiple strains of bacteria and yeast. If you chose to drink kefir, make sure it’s organic and not loaded with refined sugar.
- Sauerkraut – Typically a fermented cabbage dish which is a lot nicer than it sounds. It has a soft texture (or crunchy depending on how its made) with a mild acidity. It is reportedly high in fibre, as well as vitamins A, C, K and various B vitamins.
- Kimchi – Part of a high-fiber, low-fat diet that has kept obesity at bay in Korea as well as aiding digestion. A dish made from salted and fermented vegetables, most commonly napa cabbage and Korean radishes, it can be eaten as a side or added to everything from soups to pancakes. It is traditionally quite spicy with flavouring of chilli and garlic.

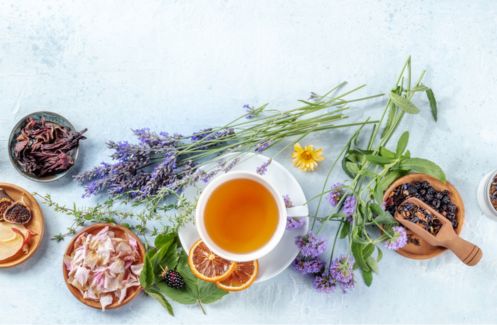
- Kombucha – Celebrities such as Gwyneth Paltrow and Madonna are reportedly fans of this fizzy fermented tea. But it’s not new, and supposedly originated in China centuries ago. It’s a fizzy, sour drink, which you can buy in an array of flavours, much like normal tea.
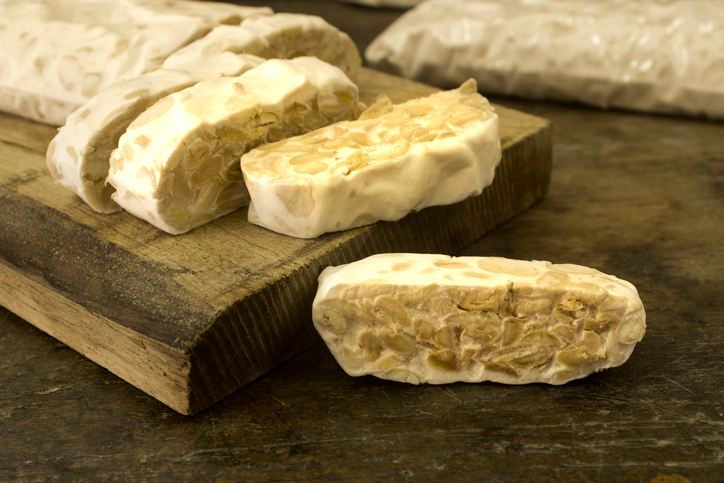
- Tempeh – This nutty-flavoured chewy food is commonly used alternative for meat in vegan dishes, originating from Indonesia. It is known there as a ‘cake’, made by combining soybeans and a yeast starter. It is considered a great source of calcium, iron, and magnesium.
- Kvass- Another fermented beverage, kvass is commonly made from stale sourdough rye bread. Some find it has a similar taste to beer, and in fact has around 0.5 to 1 per cent alcohol due to the fermentation.
Finding such foods will normally require a trip to your local health food store but be aware supply might be scarce outside of big cities and they can be pricey. The beauty of fermenting at home is the ability to flavour and get creative, making the interest in the hobby soar. It can seem a little daunting (looking after kefir grains is said to be like looking after a baby), and time and space is necessary. But with years of experience, Alana shares her beginner’s guide to fermenting with Healthista.
A beginner’s guide to fermenting foods
Getting started
1. Choose a suitable vessel. There are a few different types of fermenting vessels, but by far the most convenient is a glass jar. Choose one with a well-pronounced ‘shoulder’ so that you can wedge the vegetables underneath, stopping them from floating to the surface during fermentation. I prefer clip-top jars – they allow for the gasses produced during fermentation to be released slowly (they are self-burping), reducing the need to ‘burp’ (release the gasses by quickly popping the lid) the jars manually. Recycled jars can be used but will need to be burped every few days to release the build up of gasses.
2. Wash the jar in hot soapy water and rinse before use. There is no need to sterilise.
3. Choose your vegetables (and fruit if using). Most vegetables ferment brilliantly. There are no hard and fast rules – have fun and experiment. You can opt for a single vegetable ferment or a combination of a few. Organic is best (the chemicals used on non-organic vegetables can inhibit the growth of good bacteria), but if you can’t get hold of organic, just wash thoroughly, peel and/or remove the outer layers before fermenting.
4. Choose your herbs and spices. Again, there are no rules here… experiment!
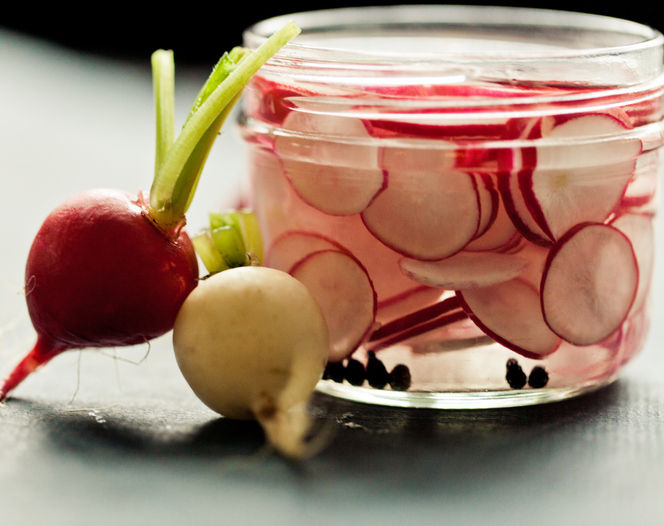
Pickled vegetables (brine ferments)
Ingredients
- Vegetables of choice – beetroot, radish, onions and cauliflower all work really well
- Spring/filtered water
- Sea/Himalayan salt @ 2% salt to water. E.g. 100ml of water = 2g salt. You may have some excess brine as it’s a guess as to how much you’ll need to fill the jar once all the veg are inside, but it’s best to have too much than too little.
Method
– Make the brine. Dissolve a good quality salt (sea/Himalayan) in spring or filtered water. It’s best not to use water straight from the tap as the added chlorine and fluoride inhibit the growth of good bacteria during fermentation.
– Wash, chop (and peel if non-organic) your chosen vegetables. Pack into the sterilised jar(s), leaving 1 inch of room at the top, wedging the veg underneath the shoulder of the jar. Add your chosen herbs and spices (or layer as you go). Fill the jar with brine, not to the top but so it covers the vegetables by about 1cm.
– Secure the lid. Leave on your kitchen worktop out of direct sunlight and away from any heat producing equipment (oven, kettle, etc.). Burp jar when necessary. Normally every few days is a good measure to go by. If it seems really gassy when you burp it, increase burping to every 1/2 days.
– Taste after 10 days and continue to taste until they’ve reached the desired flavour. Refrigerate when you’re happy with the taste, where it will keep for 3 months.
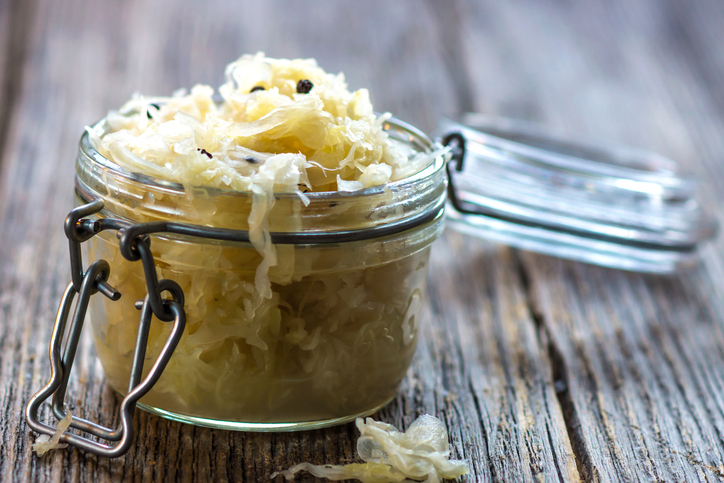
Sauerkraut and kimichi (dry salt ferments)
Ingredients for a basic kraut
- Cabbage – white or red
- Sea/Himalayan salt at @ 2% salt to weight of cabbage
- Caraway seeds, to taste
Method
– Remove the outer leaves from the cabbage (keeping them whole where possible) and set aside for later use.
– Shred the cabbage into a clean bowl.
– Add the salt and caraway seeds.
-Massage and squeeze with your hands for a couple of minutes then leave covered by a tea towel for 20 minutes for the salt to draw the liquid from the cabbage. The salt will do most of the work for you but if you’re short on liquid (there should be a generous pool in the bottom of the bowl) give it an extra massage until you have enough.
-Pack tightly into the sterilised jar and tuck in with the saved outer leaves of the cabbage.
-Add extra brine if necessary.
-Secure the lid. Leave on your kitchen worktop out of direct sunlight and away from any heat producing equipment (oven, kettle, etc.). Burp jar when necessary.
-Taste after 10 days and continue to taste until they’ve reached the desired flavour.
-Refrigerate when you’re happy with the taste, where it will keep for three months.
The beauty of fermenting foods at home is that they are personal to you. Every fermented food is unique to its creator, location and produce available.
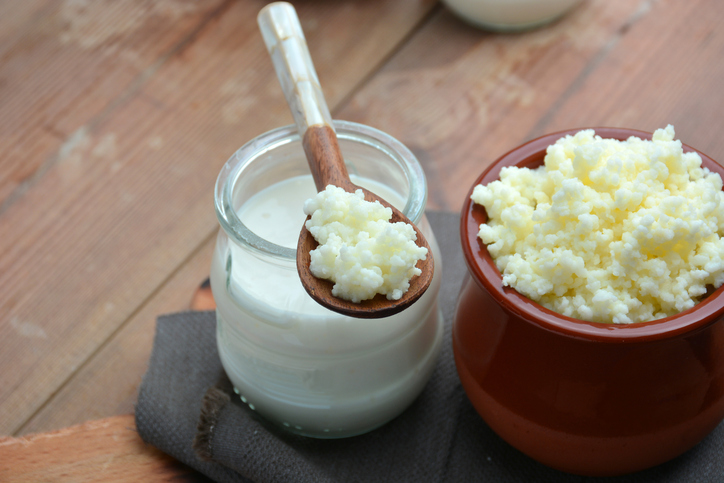
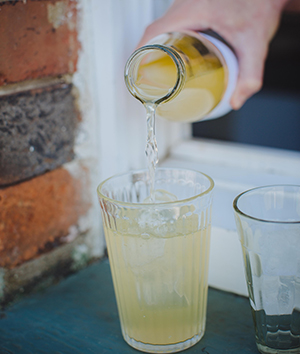
Water kefir
Ingredients
Makes 1 litre
- 2tbsp water kefir grains (can be bought on Amazon, or find someone, a friend of family member who is also into fermentation, who will give them to you)
- 2tbsp raw cane sugar
- Filtered or spring water
- Flavour with any fruit, vegetable, herbs and/or spices of choice
- You will need: 1 x 1litre glass clip-top bottle (IKEA) and a 1.5 litre clip top jar (Kilner/IKEA)
Method
-Wash the jar and bottle in hot soapy water and rinse.
-Dissolve the sugar in the water by leaving to sit in a jug for 5 or so minutes, stirring a few times throughout. It needn’t be completely dissolved, just mostly.
-Place the kefir grains into the cooled jar and pour in the sugar water. Secure the lid and write the date on the jar (you’ll forget otherwise!)
-Leave in a warm place, out of direct sunlight, for 24-48 hours. At the end of this period, you should see bubbles in the kefir – this means it is active and the fermentation has been successful.
-Strain the kefir through a non-metal sieve into a jug (or directly into the bottle if you have a funnel), retaining the kefir grains for the next batch. The grains can be used continuously to make kefir and if well looked after, will last a lifetime.
-Flavour your water kefir by adding a little pure fruit/vegetable juice, pieces of fruit, herbs and/or spices. Some of my favourite flavour combinations are rhubarb and ginger (in L A B’s Spring Box), orange and lemon and lemon and thyme.
-Secure the bottle lid and leave to carbonate (this will happen naturally) for 12-24 hours, before transferring to the fridge where it will last for up to 3 weeks. Fruit higher in sugar will carbonate very quickly – be mindful of this and keep an eye on it as it can cause your bottle to explode. High sugar fruit will only require a short carbonation period.
How to care for your kefir grains
When you receive your kefir grains, they will need a chance to wake up from their slumber. Rinse them well in filtered water before using and toss the first batch of water kefir as it will not be fully fermented.
Kefir needs to ferment at room temperature, so once you’ve added the fresh sugar water, keep them on your worksurface. If you need to take a break (holiday or similar) then you can feed them fresh sugar water before transferring to the fridge, where they will keep for three weeks.
Are you a fermenting expert? Share your creations with us by tagging us on Instagram and Twitter: @HealthistaTV
 Alana Holloway is the founder of Fermented by LAB, a new fermented foods and drinks subscription service. Each box, delivered on the 3rd or 19th of every month (or the closest working day if the 3rd or 19th fall on a weekend), offers a mixture of organic fermented goods that are rich in a variety of probiotic cultures, from kraut and kimchi to kefir and kvass, presented in three 480g jars and three 500ml bottles (Big Box). The boxes are priced at £36 a month (Big Box), £20 a month (Baby Box) and £34 a month (Soda Box), plus delivery.
READ MORE:
Can fermented foods change your life?
Is fermenting the new juicing?
Probiotics – 13 things you REALLY need to know
A cure for IBS? This probiotic pill is scientifically proven to help
8 new superfoods your body needs right now (Clue: kale is not one of them)
Like this article? Sign up to our newsletter to get more articles like this delivered straight to your inbox.